Hi beginners, if you are new to Dislyte and looking for the most important information for a better start, you’ve come to the right place.
Here are the best tips for new players to have an easy no-brainer early game, while also having a good understanding of the most crucial parts of the game to focus on.
This guide is written and shared by Dudeogama#0122. Play Dislyte is allowed to reshare it to the community. For keeping updated, you can also take a look at the Doc version of the article here.
About This Dislyte Beginer’s Guide
If you’re here, you’re probably looking for answers when you first start playing Dislyte.
I’m Brahms, and you can basically consider this as in-depth of a resource as possible about Dislyte for new players. From explaining mechanics to breaking down bosses, team structures, and why certain Espers work, you’ll hopefully find everything here short of a definitive tier listing. A good portion of this information is contained within the game itself, but a lot of it is hidden or put out of the way, and so I thought to bring it all to light.
This guide will not be covering the topics of “Is x Esper good/bad”, “who is better x or y”, “should I use a or b” or “what should I build on y”. Instead, you can check out our Tier List, ask in public chat for popular builds, or view the information in game associated with each Esper.
This guide assumes you have basic knowledge on game mechanics and gacha systems, but if there’s anything else you think could be useful to add, please don’t hesitate to let me know! You can message me any questions on Discord at Dudeogama#0122. Please note that if you just ask about builds or Espers in general, I will likely refer you to this document or the tier lists.
Also, I’ll totally plug here: You can find me on any socials under the handle @dudeogama, and catch me on Twitch at https://twitch.tv/brahmsogama!
Anyway, without further ado, here’s the Dislyte beginner’s guide. You’ll find that everything can be navigated using the tables of contents, so I highly recommend you go through that to find the exact place you need to go.
The guide is updated up to the May 13, 2022 patch (version 3.0.0). Happy release, Espers!
Beginner’s Frequently Asked Questions
Are there any codes for free items?
Yes, please check out our Dislyte Codes section for the latest working codes and to see how to activate them.
Where are my preregistration rewards? I logged in and don’t see anything!
The pre-registration awards are given out under the “Events” tab, called Union Parade.
The event gives you 2 Gold Records (as well as other various rewards) every day for 5 days, for a grand total of 10x Gold Records!


To see this event in your Events Tab, you must get to Account Level 5.
When do I unlock features?
Note that I will not be including rewards for clearing each chapter specifically, those are easily viewed by clicking the Rewards button on said story chapter.
| Requirement | Feature Unlocked |
| Clear Story 1-1 | Drew[Anubis] Esper |
| Clear Story 1-3 | Change Battle Speed (1x/2x/3x) Mona[Artemis] Esper (forced Gacha) Echo (Gacha pulls) |
| Clear Story 1-6 | Q[Eros] Esper |
| Clear Story 1-8 | Atlas Functionality |
| Clear Story 2-1 | Auto Battle Functionality |
| Clear Story 2-8 | DJ Contest Minigame Gold Shop (1st and 2nd Row) |
| Clear Story 3-8 | 3rd Row in Gold Shop |
| Clear Story 5-8 | 4th Row in Gold Shop |
| Account Level 4 | Daily Missions (Partial) Course (Growth Plan) Ritual Miracle (Kronos) |
| Account Level 5 | Welcome Packs (Cash Shop) Daily Gifts Union Parade Event (Preregistration Bonus) |
| Account Level 7 | Relic Fusion Cube Miracle Cube Shop Tab Course (Recon Plan) |
| Account Level 10 | Infinite Miracle |
| Account Level 13 | Bounties + Daily Mission Ritual Miracle (Apep) Course (Ritual Miracle) |
| Account Level 15 | Esper Ascension (See: What is Ascension? Is it important? ) Sonic Miracle + Daily Mission Course (Sonic Miracle) |
| Account Level 16 | Ripple Dimension Clubs Club Shop Tab |
| Account Level 18 | Point War (Ranked PvP) Arena (Casual PvP) Tournament Shop tab Course (Infinite Miracle) Course (Point War) |
| Account Level 22 | Ritual Miracle (Fafnir) |
What Bounty Missions Should I Take?
If you don’t see any Epic/Legendary quests available, use the free Refresh. It’s okay to Refresh the list up to 5 times every day.
- Legendary – 200 Gems
- Legendary – 1 Gold Record
- Legendary – 4 Star Skill Up (this could be higher or lower depending on your units)
- Epic – 120,000 Gold (this is equivalent to 120 gems if you buy gold records from Shop)
- Epic – 100 Gems
- 4 Star Divina
- Rare – 60,000 Gold (this is equivalent to 50 gems if you buy gold records from Shop)
- Rare – 50 Gems
- Epic – 3 Star Abilimon
- 90 Energy
- Common – 30 Gems
- Common – 30,000 Gold
- Common – 5 Silver Records (you can prioritize this more if you need fodder)
- 50 Energy
Read more: Bounty Guide
Dislyte Basic Mechanics
Why should I promote an Esper?
Promoting Espers raises their ★ level, which in turn also raises their level cap. An Esper’s level cap is equal to their ★ level multiplied by 10 (2★ has a cap of 20, for example). Higher levels means more base stats (HP, ATK, and DEF), so you definitely should promote the Espers that you use to make them as strong as possible!

How do I promote Espers?
To promote Espers, they must be fed an amount of other Espers (often called food/fodder) that share the same ★ level as they do, equal to their ★ level.
- 2★ Espers must be fed 2 other 2★ Espers
- 3★ Espers must be fed 3 other 3★ Espers
- 4★ Espers must be fed 4 other 4★ Espers
- 5★ Espers must be fed 5 other 5★ Espers


An Esper can only be promoted when they are at the current maximum level. The maximum promotion level is 6★, making the maximum level 60.
What should I use as food/fodder?
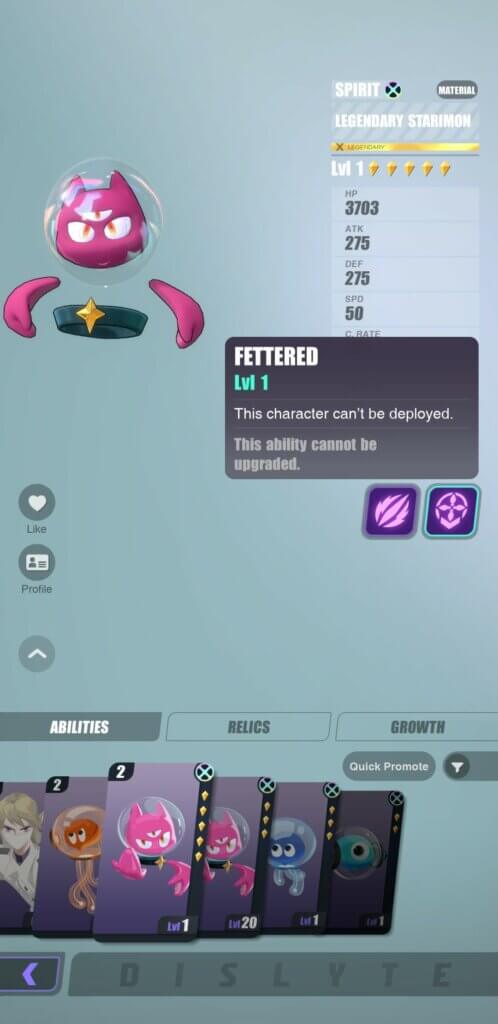
Generally, you have two options for food/fodder. The first option is to use Starimon, as they have no use outside of being food/fodder.

The other option is to raise Uncommon 2★ Espers, if you still have access to them. Previously, they were summoned via Silver Records, but as those are no longer obtainable, any 2★ Espers or Silver Records you currently have are the only ways to get them now.
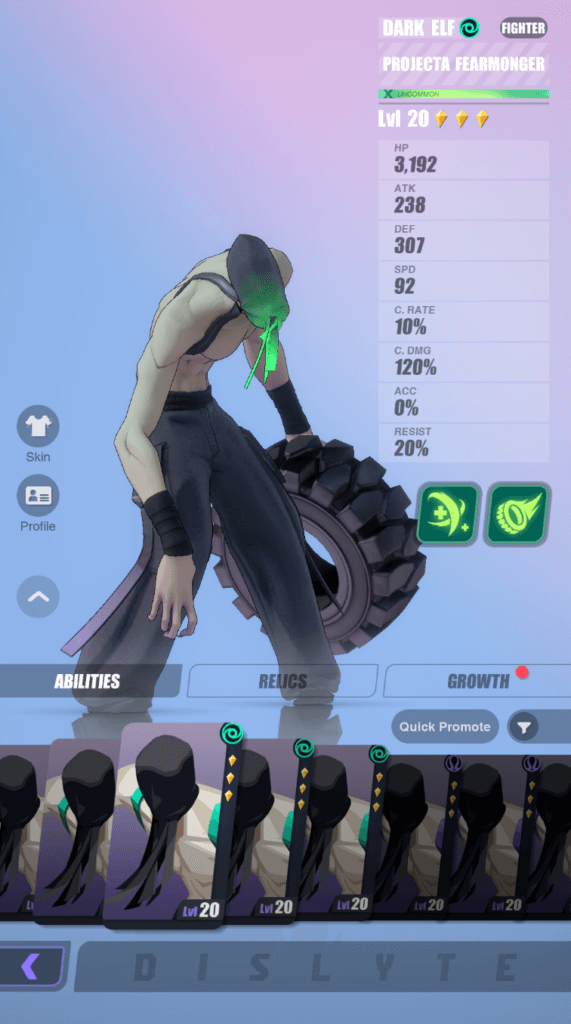

No matter which type of food/fodder you choose, the first step is to level them up (generally through combat, though you can also use Experimon), and then when they are at maximum level, promote them. This would give you a level 20, Uncommon 3★ Esper to be used as food/fodder. If you need 4★ or 5★ food, you continue to raise the Uncommon Esper up to the appropriate ★ level that you need.
How do I level up Espers efficiently?
The most EXP you can get from a stage is from the Practice Stages (#-UP) in Story mode. While these stages offer little other rewards, they also drop Experimon, which further add to the EXP gained.

To accomplish this, one of the best ways to accomplish this is to have one max level Esper (or two, in harder stages of Purgatory difficulty) accompany the food and be able to clear the highest UP Stage solo. This is because this will level multiple units at once, and the max level Esper(s) also distribute half their EXP (see: EXP Distribution).
The most accessible and effective Esper for this early on is Mona[Artemis]. The game gives you a Hades Set after clearing Chapter 9, which you should equip on her, along with a Sword Avatara two-piece set. In doing so, she’s capable of soloing a good amount of UP Stages as long as she’s levelled, and replacing the pieces for stronger ones will let her continue to keep climbing. You can bring your Mona[Artemis] at max level with 4 food/fodder to farm these stages for experience (also known as “Dog-walking”).
There are other Espers who can also achieve the same goal; Li Ling[Nezha], Tang Xuan[Sun Wukon], Donar[Thor], Ren Si[Black Tortoise], and Falken[Horus] are examples of Espers who, with a Hades and Sword Avatara Relic set, can clear UP Stages by themselves, thus allowing you to bring multiple food/fodder.
Alternate EXP Options
Even though UP Stages have the most EXP available per stamina point, the lack of any other rewards means that other avenues might also be more “efficient”.
Though difficult in a different kind of way, it is possible to bring in 1 food/fodder into other areas of the game that are farmed, in order to gain both EXP (albeit at a much lower rate) as well as required items, such as Waves from the Sonic Miracle, or Relics from Ritual Miracle. Even Ripple Dimensions provide experience, and in some cases can provide more EXP/Stamina than a UP Stage might offer.
Should I Resonate Espers?
As of patch 2.1.1, Resonating Espers is different from Star Promotion now. Previously, you could promote an Esper and gain Resonance points as well if you used the same Esper as materials for said Promotion. Now, Resonance gives you a free Starimon of that same rank, which now means you can safely resonate, but use that Starimon to Promote a different Esper.
Resonance is performed by clicking the Resonance tab on the Growth portion of the Esper Menu.
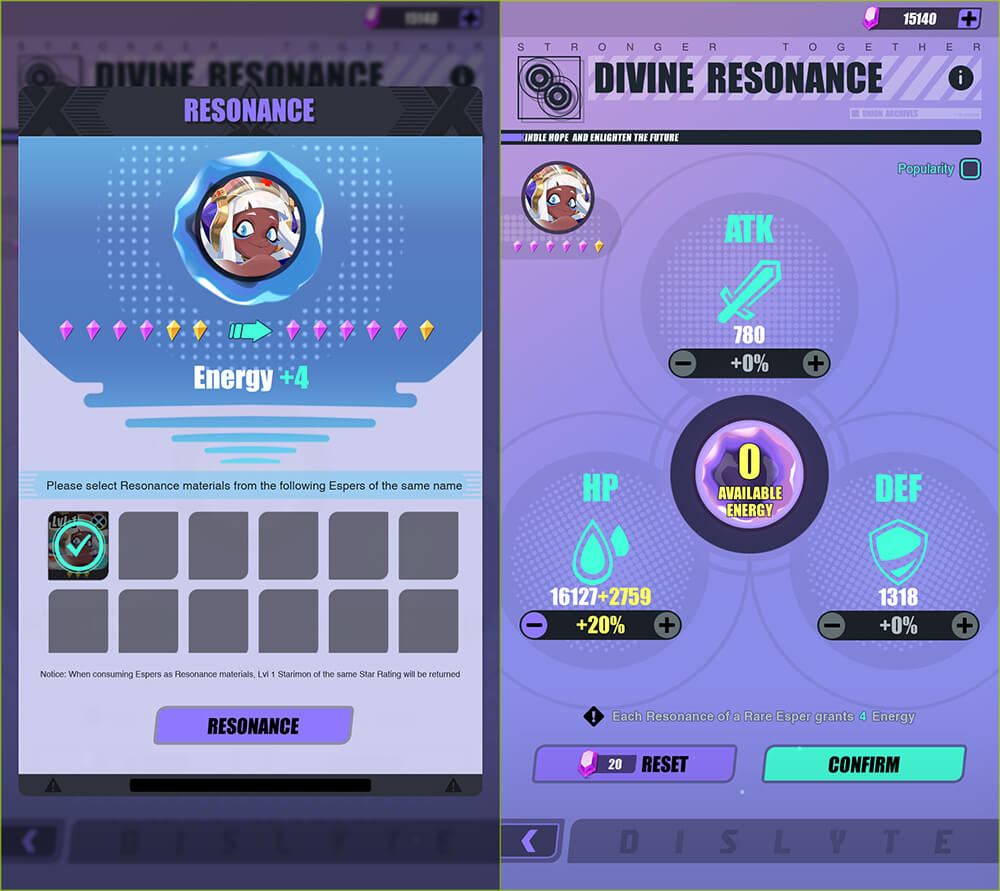
Here, you sacrifice duplicates of the Esper, to give the base one Resonance points, which are spent to raise HP, ATK, or DEF by 1% per point. How many points you get per Esper sacrificed is based on the rarity of the esper:
- 5★ Espers get 6 points per Resonance.
- 4★ Espers get 5 points per Resonance.
- 3★ Espers get 4 points per Resonance.
- 2★ Espers get 3 points per Resonance.
If you aren’t sure where to spend your Resonance Points, you can click the Popularity option at the top right to see the distribution of how all players have distributed their points for that Esper!
What is Ascension? Is it important?
Ascension is another way to power up your Espers. Not only does it provide bonuses to their stats, but at Ascension Level 3, every Esper gains a bonus addition to their kit. This might be a boost to a passive, or an extra effect on an ability! In various Tier Lists and comparisons, Ascension is almost always factored into the usefulness of an Esper. It might be better to say that without Ascending, and Esper just isn’t wholly complete. You should, at the very least, Ascend the Espers that you use up to at least level 3, though the stat boosts past level 3 far, far exceed that of the previous levels.
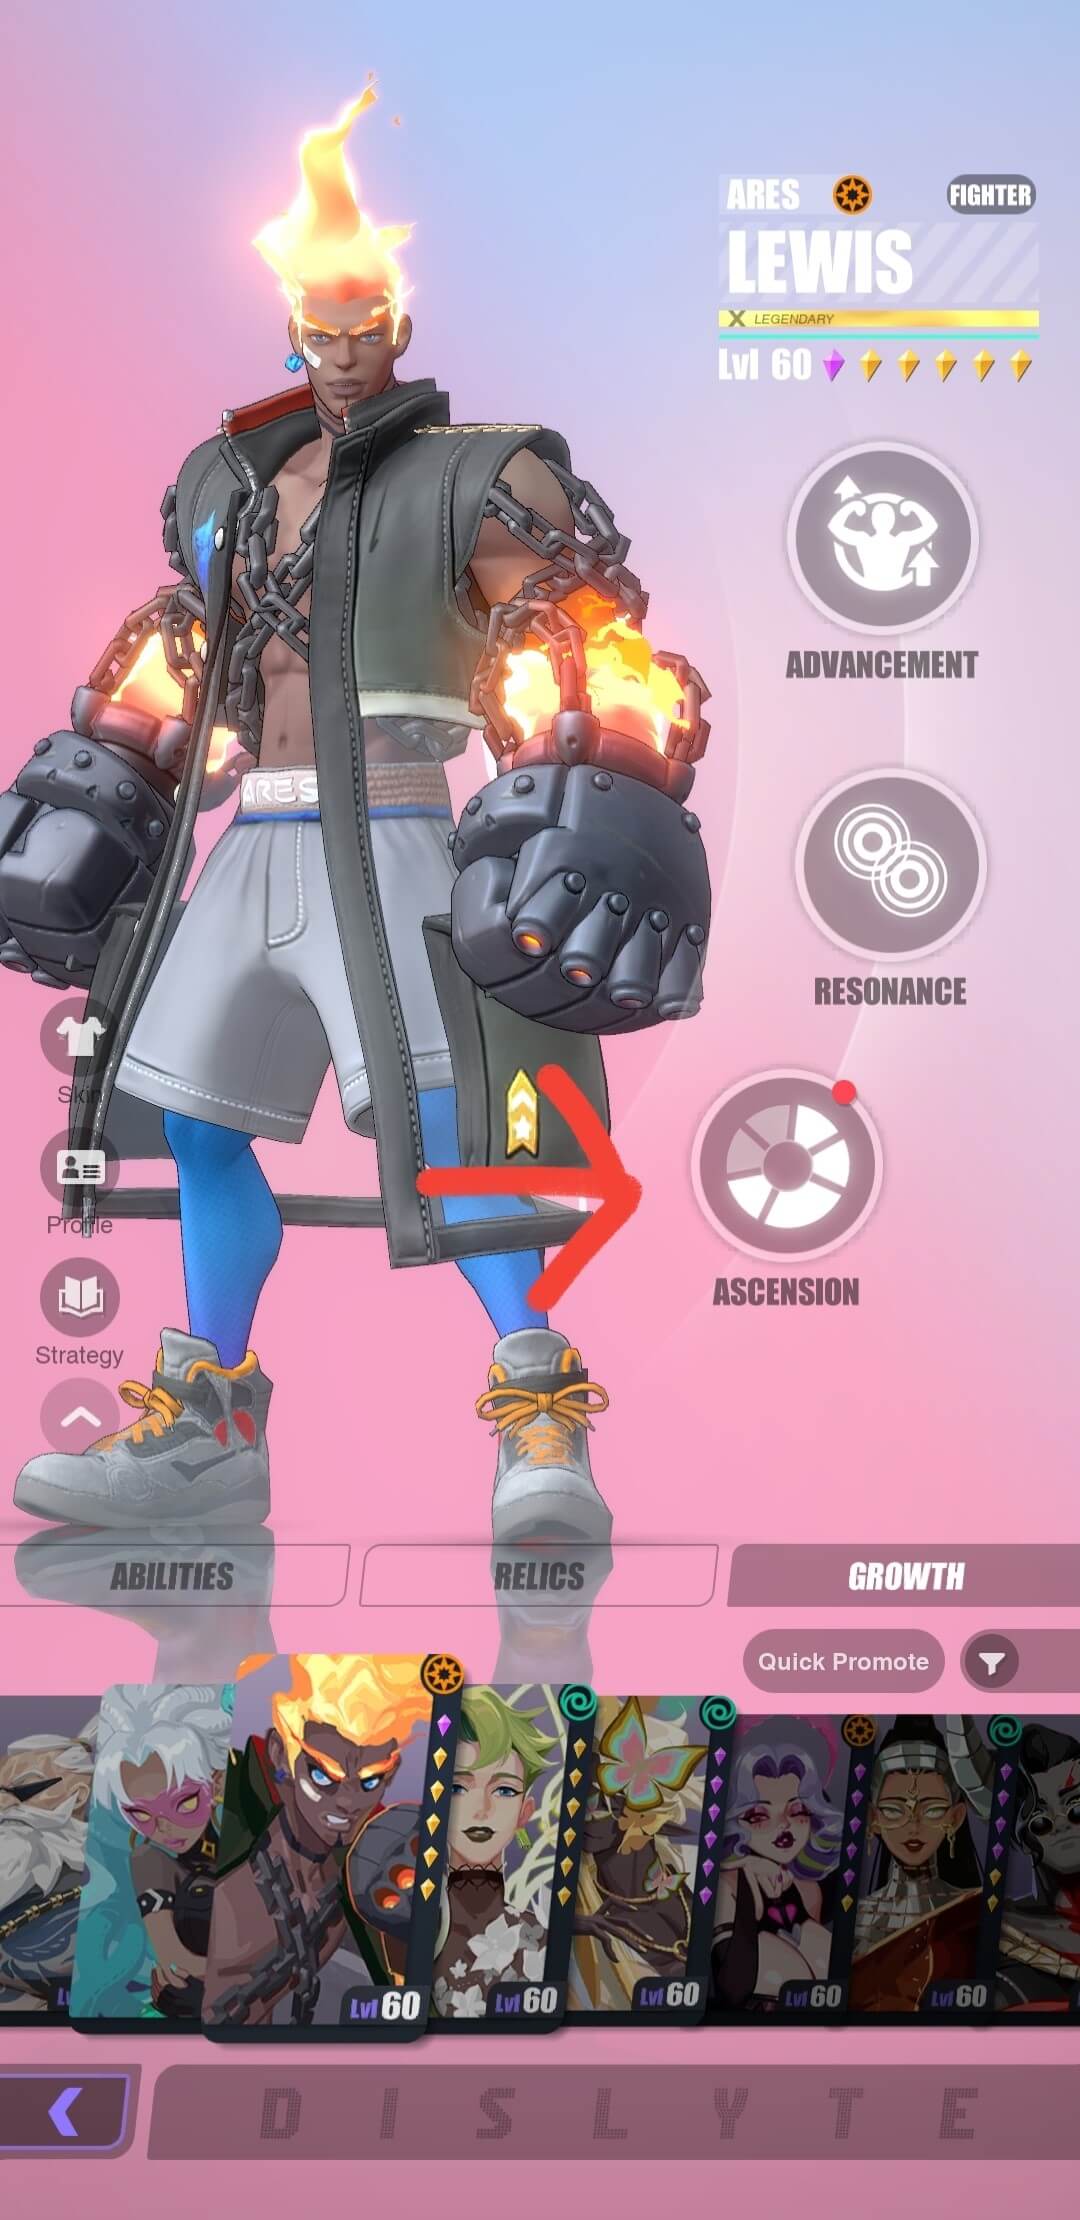
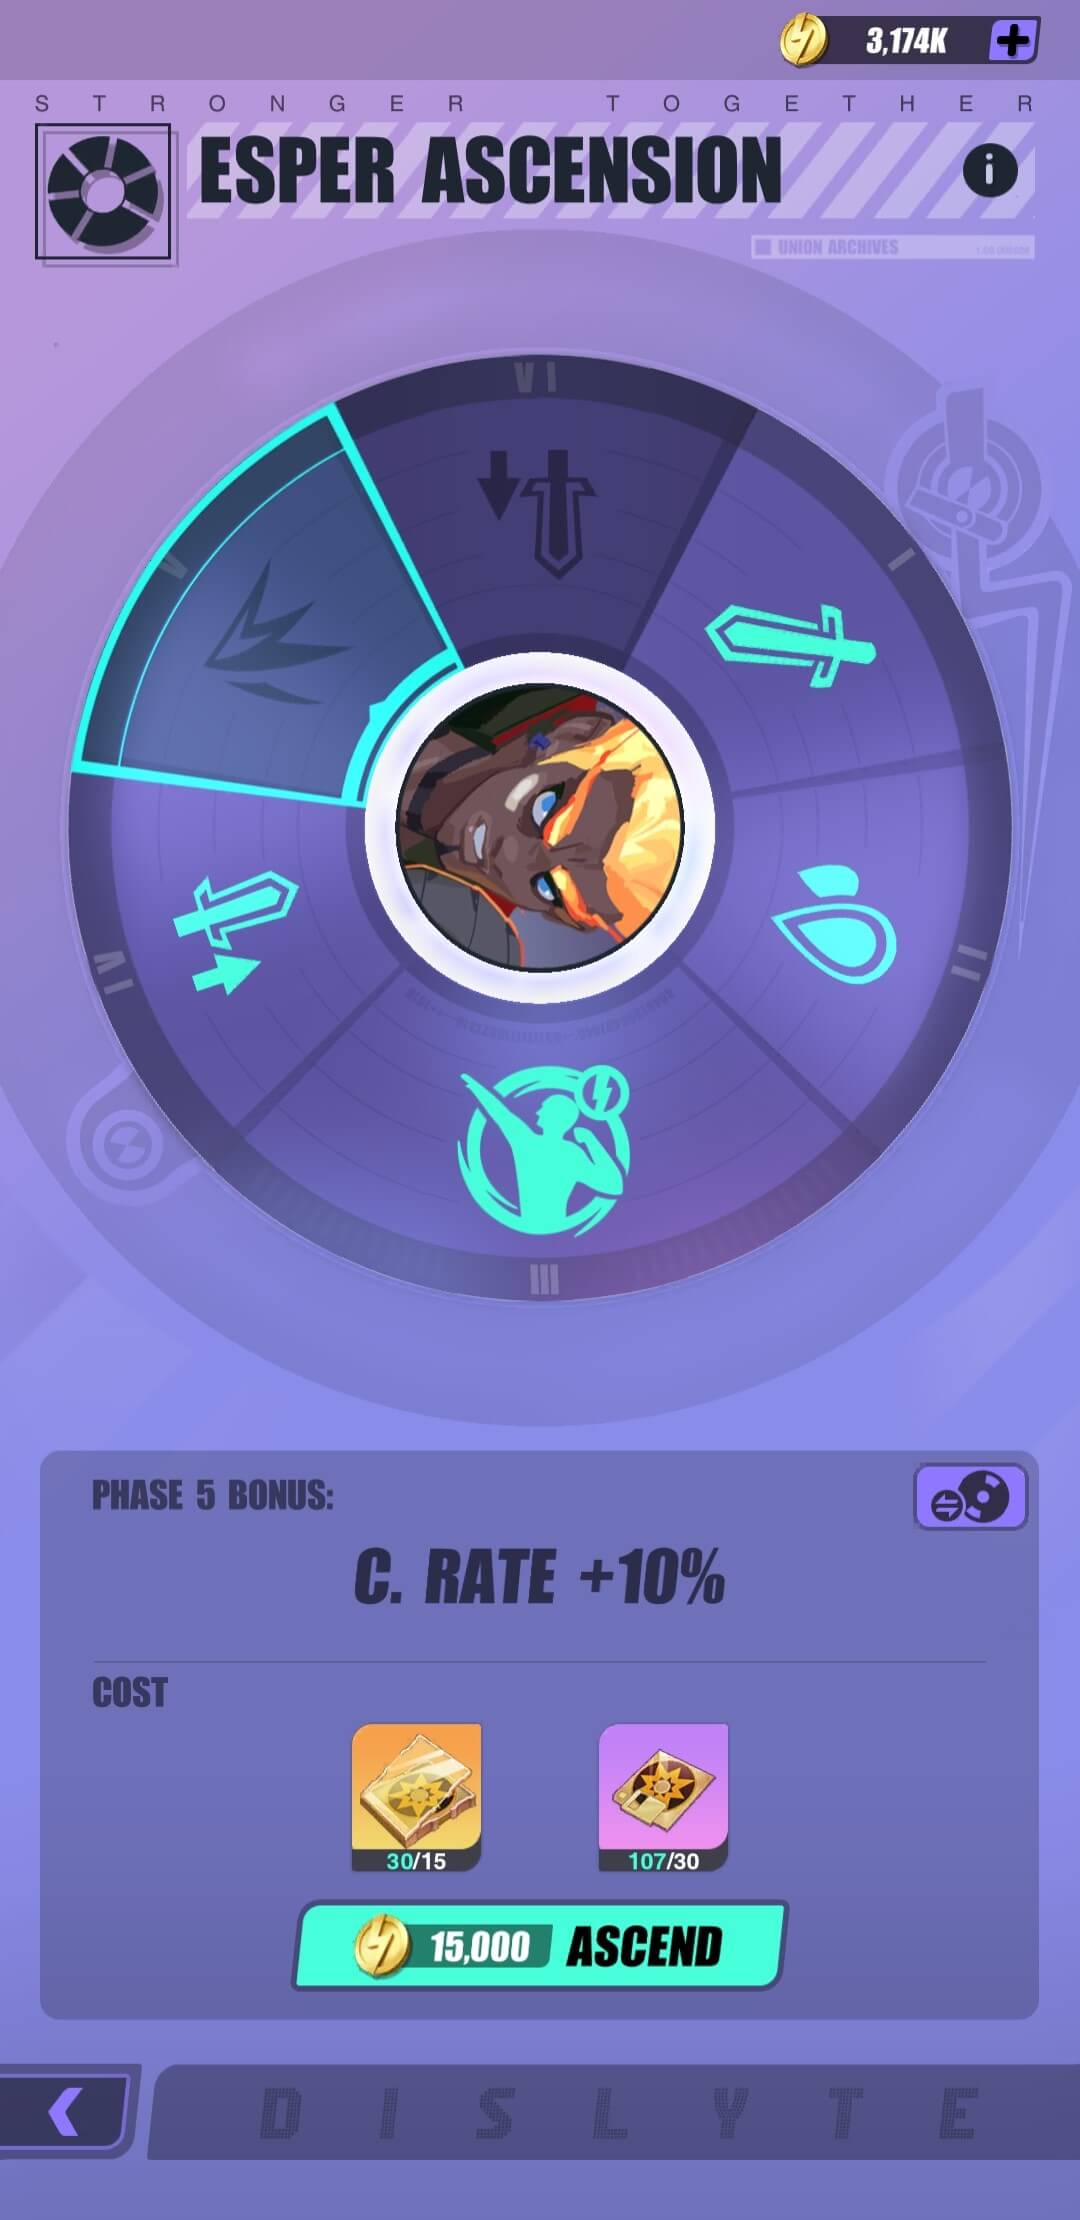
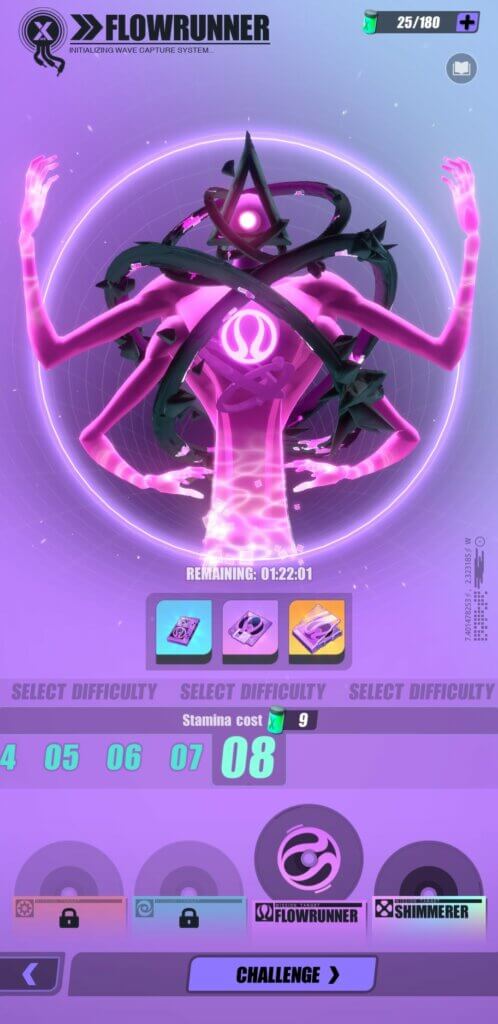
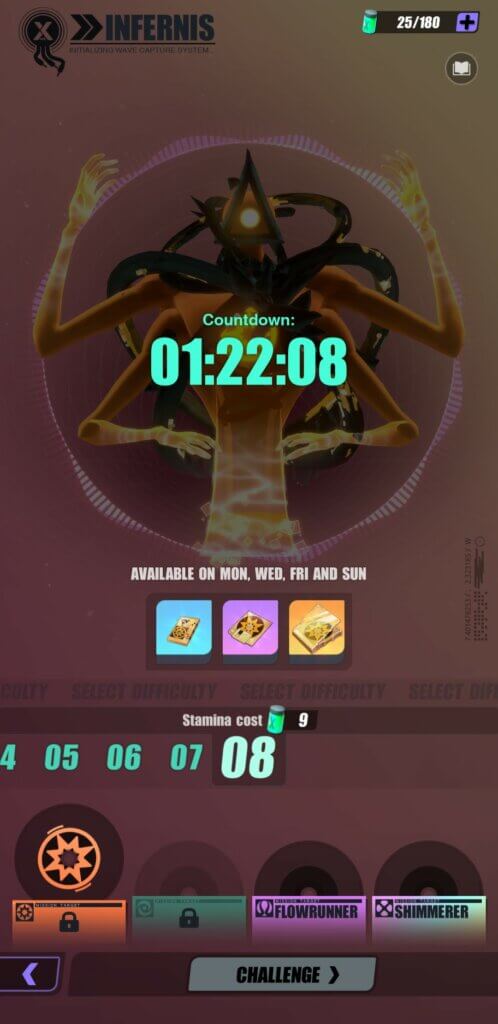
The ingredients for Ascension are called Elemental Waves, and are farmed in the Sonic Miracle from their respective bosses. Not every boss is up every day (except for Saturdays), so you will need to farm as they become available. Infernis and Windstriker are up on Monday, Wednesday and Friday. Flowrunner and Shimmerer are up on Sunday, Tuesday, and Thursday. All Sonic Miracle Bosses are available on Saturday.
Ascension is unlocked at Account Level 15, alongside the Sonic Miracle.
Battle Mechanics
What do the stats mean and what do they do?
| Acronym | Full Name | Effect |
| HP | Health Points | How much health an Esper has. When this hits 0, they die. |
| ATK | Attack | Used for every Esper’s skills to scale up their damage. |
| DEF | Defence | Used in calculations to reduce damage. Some espers also have skills that damage scale off of DEF. |
| SPD | Speed | Determines the rate at which an Esper gains Action Points (AP). See: What is the difference between Speed and AP? |
| C. Rate | Critical Rate | Determines how often a Critical Hit is triggered. |
| C. Dmg | Critical Damage | Determines how much damage a Critical Hit does. Number is directly related to the damage done. |
| ACC | Accuracy | Measured against Resist as a tertiary check to see if debuffs are applied. See: How do ACC / RESIST work? |
| RESIST | Resist | Measured against Accuracy as a tertiary check to see if debuffs are applied. See: How do ACC / RESIST work? |
What is the difference between Speed and AP?
The action bar in combat is a visual representation of turn order. Dislyte is a turn-based game, and both Speed and Action Points (AP) are used to determine who goes in what order, and when.

AP is less a stat and more of a resource; the most direct way to change your AP via gear is to either raise your Speed stat, to use certain skills that provide boosts or lower (AP Up or AP Down), or certain secondary effects that affect how much AP an Esper has in that precise situation. When AP reaches 100%, that Esper then takes their turn. After their turn, their AP resets to 0%, and then they begin building it again.
Speed determines how much AP you gain in comparison to all the other Espers. This is a linear value. This means that an Esper at 200 Speed will take two turns for every 1 turn an Esper at 100 Speed does. Speed effectively becomes perhaps for most Espers’, the most important stat.
It may help to think of turns like they’re a race. AP is how far you’re done your current lap, and Speed is how quickly you finish a lap. When AP is 100%, you complete a lap and start the next one.
How do ACC / RESIST work?
Accuracy (ACC) and Resistance(RESIST) are a second check to see if a debuff hits, after the initial check of the attack’s chances. Put simply, no attack has a 100% chance to apply debuffs, even if the attack says it does. For this example, let’s look at Jacob[Jormungand] attacking a high RESIST Unky Chai[Yue Lao].


In this example, Jacob[Jormungand] will use his Skill 1: Serpentine. Serpentine has an 80% chance of inflicting Poison for 2 turns at max rank.

When Jacob[Jormungand] attacks, the game will first check to see if the Poison will hit (80% rate). If it determines it will not, no Poison occurs. If it does, it goes to a second check: elemental disadvantage. If the attack Misses, Poison cannot occur. If it is a normal hit, an Elemental Boon, or a Crit, then the attack goes to a third check.
If the Poison hits, the game then takes Jacob[Jormungand]’s Accuracy and measures it against Unky Chai[Yue Lao]’s RESIST in a simple formula:
Defender RESIST – Attacker Accuracy = Chance of debuff being fully Resisted.
- If the resulting value is less than 20%, the Defender has a flat 20% chance to Resist the incoming debuff.
- If the result is larger than 20%, that value is the Defender’s chance to Resist the incoming debuff.
Thus, in our situation:
100% (Unky Chai[Yue Lao]’s RESIST) – 70% (Jacob[Jormungand]’s Accuracy) = 30%
Therefore, at the end, even if Jacob[Jormungand]’s S1 passes the initial check for Poison, Unky Chai[Yue Lao] still has a 30% chance to Resist the poison.
Is more than 80% RESIST useless?
Because of the above calculation, one might think that having more than 80% RESIST is useless. That’s because of the flat 20% chance to Resist in the cases of the attacker having more accuracy. Think about it like this:
Defender has 100% RESIST & Attacker has 100% Accuracy → 100% – 100% = 0% → Defender is granted flat 20% chance to Resist
Defender has 80% RESIST & Attacker has 100% Accuracy → 80% – 100% = -20% → Defender is granted flat 20% chance to Resist
Defender has 0% RESIST & Attacker has 100% Accuracy → 0% – 100% = -100% → Defender is granted flat 20% chance to Resist
However, think about the cases where the attacker has lower accuracy.
Defender has 100% RESIST & Attacker has 50% Accuracy → 100% – 50% = 50% → Defender has 50% chance to Resist
Defender has 80% RESIST & Attacker has 50% Accuracy → 80% – 50% = 30% → Defender has 30% chance to Resist
Defender has 100% RESIST & Attacker has 0% Accuracy → 100% – 0% = 100% → Defender has 100% chance to Resist
Defender has 80% RESIST & Attacker has 0% Accuracy → 80% – 0% = 80% → Defender has 80% chance to Resist
In the later cases, that 20% chance of being debuffed might mean you get disabled, and miss your turn. Only you can value how much that chance means to you, but there is an argument for having more than 80% RESIST. The only time it doesn’t matter is when an Attacker has 80% or more Accuracy, but that is only ever encountered in Point War.
Why do Elemental Classes matter?
Strictly speaking, Elemental Classes matter because having an elemental advantage means you have more chances at dealing more damage. Elemental Classes also affect your chance to apply buffs/debuffs, please read more here.
Inferno beats Wind, Wind beats Flow, and Flow beats Inferno. Shimmer is neutral against all elements.

If an Esper has an elemental advantage, they have an extra +15% crit chance on top of what they have, and if that fails, a 50% chance to trigger an Elemental Boon (+30% damage).
If an Esper has an elemental disadvantage, they have a +50% chance to Miss (-25% damage, cannot inflict Debuffs).
When an attack occurs, the game determines the outcome in this order:
- Will the attack Miss (-25% damage)? If not;
- Will the attack Crit (+ damage based on C. DMG modifier)? If not;
- Will the attack gain Elemental Boon (+30% damage)? If not;
- Regular damage.
Elements are not the only thing that affect Miss, Crit and Elemental Boon. The Miss Rate Up debuff increases Miss Rate by 50%, and some Espers cannot ever Miss, even if attacking with an elemental disadvantage (e.g. Triki[Loki]). An Esper attacking in elemental disadvantage can never have an Elemental Boon.
How do buffs and debuffs work?
Any Esper can have up to 12 buffs and debuffs total. What this means is that the 12 slots are shared, you can’t have 12 buffs and 12 debuffs, but instead they add up to 12 at maximum (for example: 5 buffs and 7 debuffs).
Buffs and debuffs follow the FIFO (First in, First out) rule: which means that if you’re at 12 buff/debuffs, and then a new one is applied, the oldest one is removed.
Buffs and debuffs do not stack, but instead refresh duration. This means that if you have two Espers who can give you ATK Up (+40% ATK), if they both cast it you do not have +80% ATK. The only exception is the Shield gained from Adamantine set Relics. If you have two or more Espers equipped with this set, the value of the shield is added all together, however you only get one buff icon. This means that the entire shield is vulnerable to being dispelled and/or stolen all at once. It also only counts as one buff for Espers who gain benefits from having multiple buffs (e.g. Chloe[Medea], Narmer[Ra])
Buffs with a golden border cannot be dispelled or stolen except under very specific circumstances (e.g. Donar[Thor]’s passive; Thundercrack, which can be dispelled if he is immobilized while he has the buff active).
Debuffs with a silver frame cannot Miss or be Resisted, meaning they do not benefit from ACC or are blocked by enemy RESIST. However, they also require a trigger; something else must happen for them to take effect (e.g. Jiang Man[Meng Po]’s Netherbloom will trigger after the afflicted target takes 5 hits). If the silver frame debuff has an effect afterwards, that requires the ACC/RESIST check (see: How do ACC / RESIST work?).
Progression
Basic Teambuilding
All beginners will first pull Mona[Artemis] on their first pull as directed by the story. You will also always have Helena[Helen]. With your other story members, that means you are guaranteed to have a party of Mona[Artemis], Drew[Anubis], Q[Eros], Brynn[Valkyrie], and Helena[Helen]. While this is okay for the first few chapters, you will obviously want to replace these Espers quickly.
A good party for progression through most of the Story and various floors of Infinity Miracle will often consist of 2 DPS (preferably Espers with AoE), 1 Support Esper (either with buffs for your party or debuffs for the enemy), 1 Healer Esper, and then 1 Fill (Commonly, this will be filled with either a second healer, or a Disabler). This won’t clear all content, but powering up a strong core can lead to being able to auto-battle through a good portion of this content.
An easy example team to build involves your starter legendary Esper, no matter who you get, and Mona[Artemis]. These two on their own provide more than enough DPS to push through the story. Fill the rest of your team with healers, supports, and disablers as appropriate. Such a team is fairly well rounded to deal with most challenges they will come across.
Recommended AoE Espers: Lin Xiao[White Tiger], Li Ling[Nezha], Mona[Artemis], Tang Xuan[Sun Wukong]
Recommended ST Espers: Tang Yun[Six-Eared Macaque], Freddy[Fenrir], Drew[Anubis]
Recommended Healer Espers: Chang Pu[Yao Ji], Berenice[Bastet], Asenath[Neferti], Heng Yue[Chang’e]
Recommended Support Espers: Gabrielle[Njord], Unky Chai[Yue Lao], Ye Suhua[Shao Siming]
Recommended Disabler Espers: Long Mian[Ao Bing], Melanie[Medusa], Eira[Freya]

How do I beat 12-8?
The boss of 12-8 has some fairly potent debuffs including DEF Down and Poison, so ensuring that you have both Immunity as well as the ability to cleanse is important. His S2 has the ability to inflict HP Ceiling, reducing your maximum HP for the fight, so you cannot let the fight go on too long.
The boss’ second form ramps this up with even more Poison, now incorporating Buff Blocker to stop you from putting up buffs, and being able to dispel buffs on a target and prolong any debuffs that may be already existing. It’s important to note that dispel can still be Resisted, and a well timed Immunity will negate Buff Blocker. His second form has less HP than the first so taking him out quickly is the key.
Alternatively, while the boss of 12-8 cannot be disabled, he can be debuffed. This means you can inflict all the “Down” type debuffs (ATK/DEF/SPD/AP Down). An AP Down + SPD Down team comp (see: Kronos Breakdown -> AP Down + SPD Down team for team building ideas) can effectively never let the boss take a turn and defeat him that way.
How do I beat the Spatial Tower?
For a good portion of the Tower, a good AoE cleave team will be able to blaze through most waves. You may need to edit your team based on specific floors, enemy compositions, or floor mechanics, but an invested team can pretty much kill anything.
The boss on Floor 100 has some fairly specific mechanics to take down. The safest team comp to bring into this floor consists of two strong AoE DPS Espers, and three healers or supports. One support should have a party Immunity buff, and another should be able to cleanse debuffs. Disablers and CC can have some value, but generally need a different style of team.
Recommended AoE Espers: Lin Xiao[White Tiger], Li Ling[Nezha], Narmer[Ra]
Alternates: Tang Xuan[Sun Wukong], Mona[Artemis], Hyde[Hades]
Recommended Healer Espers: Chang Pu[Yao Ji], Sally[Sif], Asenath[Neferti], Clara[Hera]
Alternates: Berenice[Bastet], Heng Yue[Chang’e]
Recommended Support Espers: Gabrielle[Njord], Unky Chai[Yue Lao], Ye Suhua[Shao Siming]
Alternates: Catherine[Hela], Fabrice[Freyr]
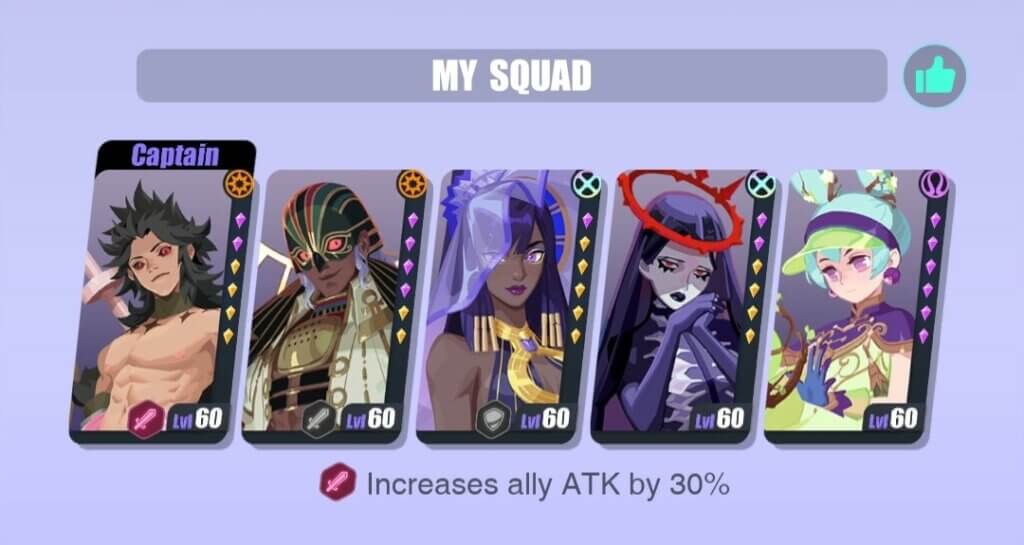
To take down the boss at Floor 100, there are some important things to note.
- The boss’ S1 attacks one Esper, and inflicts DEF Down. Annoying, but not unsurmountable.
- The boss’ S2 charges up over 2 turns. When full, it attacks all Espers 4(!) times, can reduce all targets’ AP, and then gives itself DEF Up while also giving its followers a Shield. This has synergies not only with its S3, but also the followers’ attacks as well.
- The boss’ S3 only goes off if the followers still have a Shield. If it goes off, it attacks all Espers 3 times, with a chance to have a buff dispelled on each attack, and then hits one Esper for bonus damage based on the amount of Shield absorbed. If no minions have any Shield, the boss is Stunned.
- The left follower attacks all Espers, and boosts the boss’ AP when it does so. If it has a Shield, the attack also Stuns. While it is alive, the boss gets extra SPD, and when the follower is dead, the boss gets extra ATK.
- The right follower attacks all Espers, and inflicts ATK Down. If it has a Shield, the attack also inflicts HP Ceiling. While it is alive, the boss has Lifesteal, and when it dies, the boss has extra ATK.
That may seem like a lot of things to track, but the above team is built to deal with a good portion of the mechanics in similar ways.
- Save AoE abilities and do not use them until after the boss has used its S2.
- On the turn the boss is going to use its S2, use an Immunity skill, as well as any defensive buffs, or offensive debuffs to tank through the damage.
- When the minions are Shielded, use both DPS’ AoE abilities to break the shields immediately.
- With the Shields broken, the boss will be stunned. Now is the time to lay damage out!
Some teams, depending on speed and skill levels, can ignore the minions and just focus on the boss this way. Some teams will opt to kill one minion; in this case, killing the right minion is desirable to avoid any HP Ceiling and also to stop the threat of ATK Down (since the Stuns will be mitigated by the Immunity). The boss will get stronger when it dies, which makes step 2 more important, and mitigations extremely useful.
How do I climb in the Cube Miracle?
For the most part, you can treat the Cube Miracle like it’s Story / Early Tower. A standard cleave team can take down just about anything in your way that you are on level with, barring the occasional Alexa[Aphrodite] that will need some manoeuvring around.
Once you hit Cube Miracle difficulty 6+, the enemies start to break past the normal experience limit. Because of this, a cleave team may start to run into difficulties. Going forwards from here, there are some things to note:
- Enemies have ridiculous speed values on these floors. Your support Espers should be 240+ total Speed to go first, and you should be running a speed Leader in order to ensure this.
- Survival is more important than killing because of the fact that any dead Espers at the end of the battle stay dead unless revived in the tower. If you’re not careful, you can lose your entire party and be unable to clear the Cube Miracle.
- Lauren is a good Esper to bring along because of this. If she revives an Esper before the fight is over, they’ll continue to be alive for the rest of the run!
- If you have enough speed, a full CC team can effectively lock down enemy comps and never let them move.
- Don’t just pick any rune! Make sure to pick the runes that best fit your team comp, and those that can effectively raise their survivability.
- Enemy icons with the horns are at higher levels than the other enemies on average. Be careful when picking fights with these!
What units should I 6★?
Mona[Artemis] will likely be your first Esper that you will want to 6★. The reason for this is stated above (see: How do I level up units efficiently?).
Supports can usually stay at 5★ and level 50 maximum because almost every support prioritises SPD over anything else, and levelling does not grant them any, thus it is better to use resources elsewhere. Point War units generally want to be as high level as they can, however, as every point of HP, ATK, and DEF will count.
The general rule of thumb is as follows:
- 6★ any of your main DPS Espers;
- 6★ any high priority tanks that you use often;
- 6★ any support Espers you use in Point War;
- 6★ whatever you’d like.
The reason for this is that promoting a unit and levelling them to level 60 will only ever grant HP, ATK and DEF. Because DPS all scale off of their ATK, levels are extremely important for them to hit as hard as they can. Tanks are second priority because they often scale off of all three stats, and will benefit greatly from the bonus levels– however, not all team comps or players will use one, hence the caveat.
Who are the best Espers to use?
By and far, even though there are clear Espers in each rank who are better than others according to our Tier List, just about any Esper can be viable when built and put into a composition. That being said, there are Espers that are better to focus on first when new, when resources are scarce and important.
Instead of going over every Esper (see a tier guide for that), here are my recommendations from the 4★ and 3★ lists, to help beginners progress and invest in Espers they’ll likely get. Keep in mind these are also for generic use: there are many Espers who are better in specific roles over being widely used that are still worth investment, but not right at the beginning.
| # of ★ | Role | Espers |
| 4 | DPS | Mona, Lin Xiao, Chloe |
| 4 | Disabler | Long Mian, Sander |
| 4 | Healer | Asenath, Heng Yue |
| 4 | Support | Dhalia |
| 3 | DPS | Drew, Freddy, Chalmers, Tang Yun |
| 3 | Disabler | Melanie |
| 3 | Healer | Berenice, Chang Pu |
| 3 | Support | Ye Suhua, Unky Chai |
Ritual Miracles
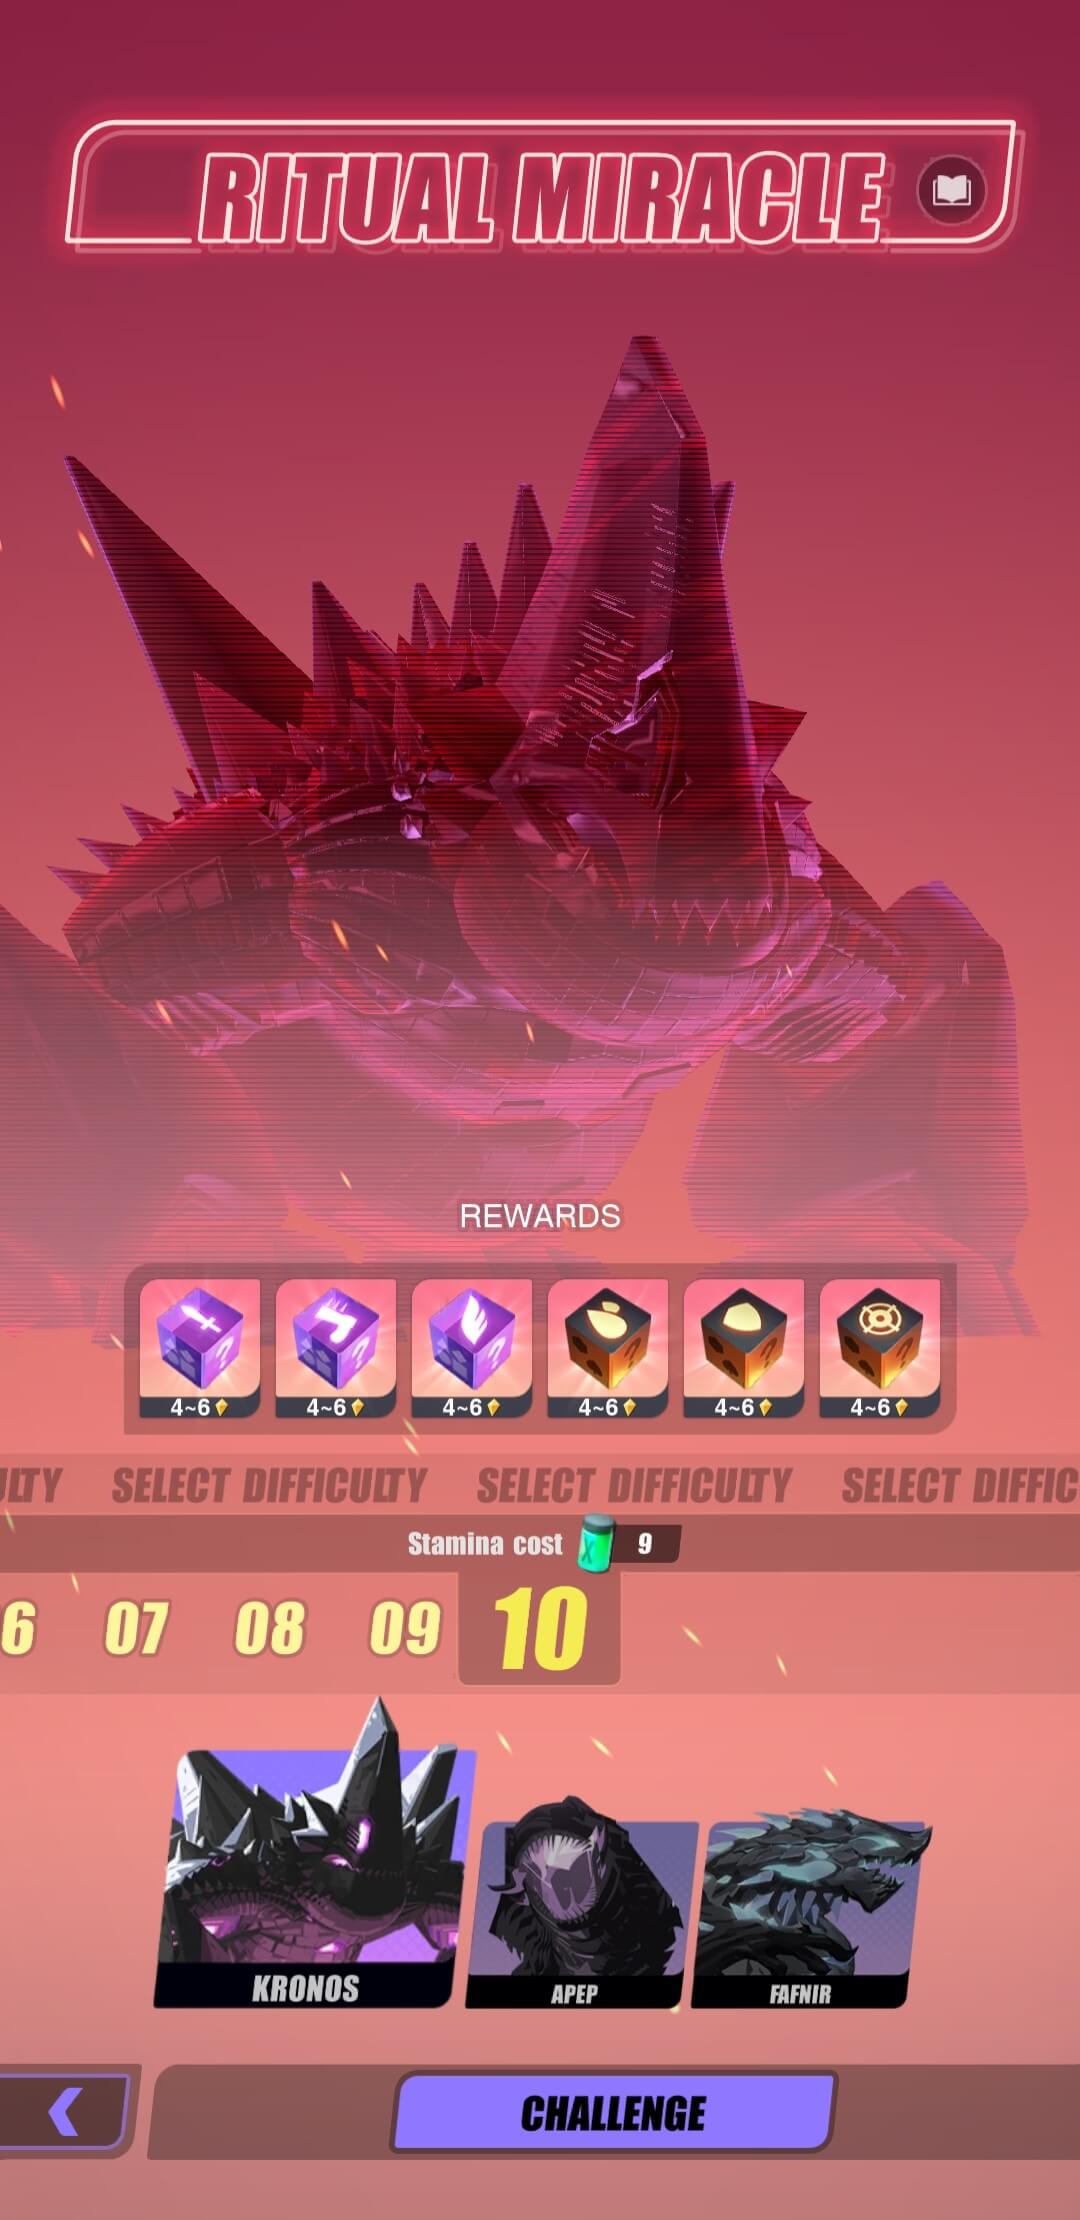
Kronos Breakdown
Kronos is the simplest Ritual Miracle boss to go up against, and often is players’ first boss they defeat at difficulty 10. There are generally two schools of beating Kronos: The AP Down + SPD Down team, or a more basic team that just slugs it out.
Kronos key points:
- all attacks hit all Espers;
- S3 does a bonus attack on the Esper with the lowest remaining percentage HP for heavy damage + stun if they survive;
- Kronos does more damage the lower health their target has. If Kronos kills a target, it gets a bonus attack (similar to Mona[Artemis] or Taylor[Hercules);
- Tablet adds do party wide damage + Stun (Suppression/Left) and cleanse all debuffs + AP Boost Kronos (Blessing/Right).
AP Down + SPD Down team
The AP Down + SPD Down team works very simply; Kronos has very low RESIST and fairly low Speed, and is thus very susceptible to these status effects. This means that Espers with the proper control abilities can make it so that Kronos and his Tablets never get the ability to act, allowing for a pain-free kill. This method requires 2-3 Espers with the proper control abilities at fairly high speeds, to ensure that he doesn’t ever act. Certain Espers, with their AoE control abilities, can make it so that Tablets can be safely ignored as well.
The cornerstone to this party is a Speed boosting Captain, those of which also generally have extremely strong AP Control capabilities. Sander[Set], Melanie[Medusa], and Tiye[Nut] are all extremely good examples of this: not only do they have either AP Down or SPD Down (sometimes both!), but their S1 all have some form of AP Down component to it, meaning that even when their big skills are on cooldown, they’re still helping control the flow of battle.
Typical party comps include at least one of these leaders, 1-2 more Control Espers, and then to fill with DPS Espers for faster kills. Support Espers are unnecessary with this team, but can also work to help AP Boost and speed kills along.
Recommended Control Espers: Tiye[Nut] (Leader), Sander[Set] (Leader), Melanie[Medusa] (Leader), Eira[Freya]
Alternatives: Long Mian[Ao Bing] (Leader), Celine[Siren], Bonnie[Eris]
Recommended DPS Espers: Li Ling[Nezha], Lin Xiao[White Tiger], Freddy[Fenrir], Drew[Anubis]
Alternatives: Chalmers[Idun], Chloe[Medea], Leon[Vali]
Recommended Support Espers: Unky Chai[Yue Lao], Asenath[Nefertem], Chang Pu[Yao Ji]
Basic Team
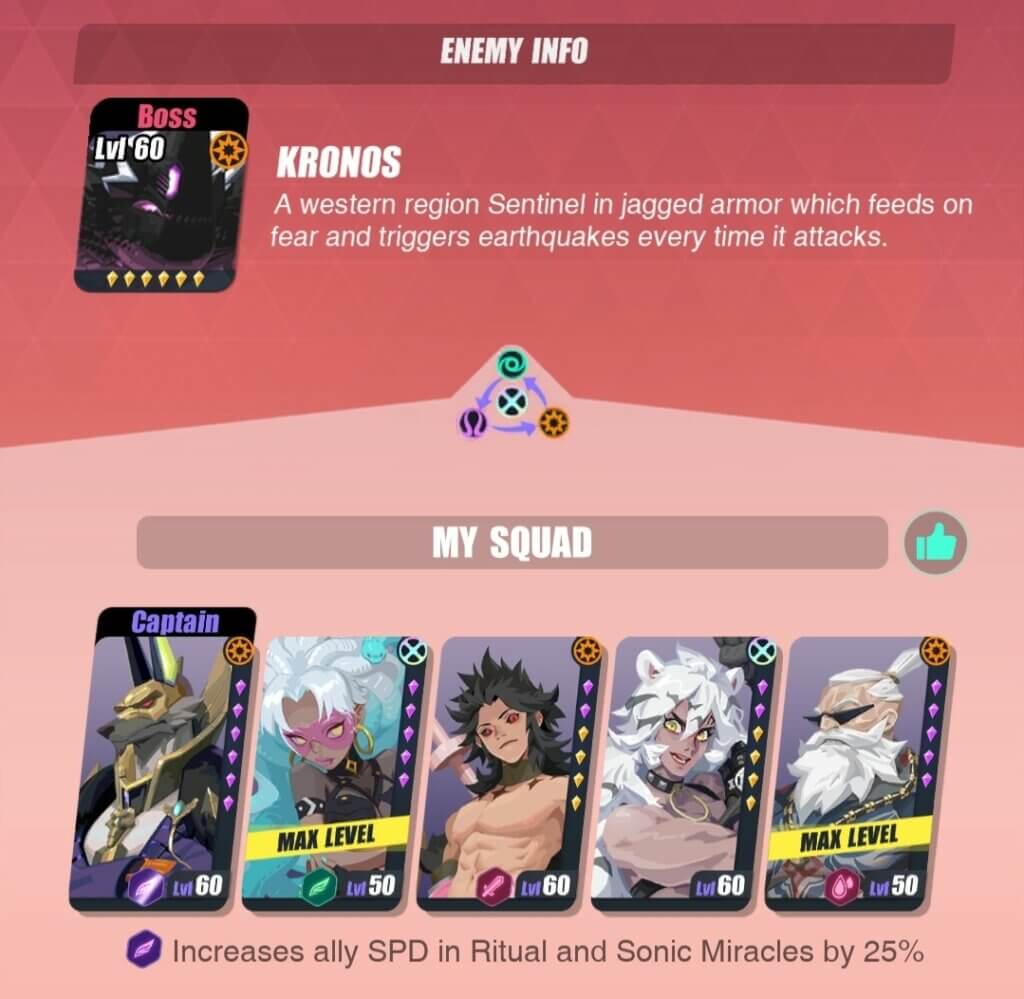
The basic team will run 1-2 DPS Espers with 3-4 supports. Their entire goal is to heal up and provide defensive buffs before Kronos’ turn to survive and not let him get his bonus attack, as letting that happen (especially at higher difficulties) is an easy way to lose at least one Esper, accelerating the eventual defeat.
For these teams, it is difficult to find Espers that have an elemental advantage as Flow does not have the best DPS Espers. Instead, one will usually rely on Inferno based Espers, to at least not take any needless bonus damage. For this line up, AP Down + SPD Down tend to be side effects rather than something aimed for, and the focus is taking Kronos down as fast as possible with ATK Up and DEF Down, while also ensuring the party is protected with DEF Up and maybe other passive defensive buffs, shields, or even inflicting ATK Down or Miss Rate Up on Kronos to survive attacks. Due to having less control on Kronos’ Speed, there’s also merit to support Espers who can help AP boost the ally team.
This team style is generally less easy to use for auto-battling, as players will want to save defensive buffs before Kronos or his Blessing Tablet get to act, that way they can put up mitigations at the right time, though that doesn’t mean it’s impossible.
Recommended DPS Espers: Li Ling[Nezha], Lin Xiao[White Tiger], Freddy[Fenrir], Drew[Anubis]
Alternatives: Chalmers[Idun], Chloe[Medea], Leon[Vali]
Recommended Support Espers: Asenath[Nefertem], Sally[Sif], Ye Suhua[Shao Siming]
Alternatives: Clara[Hera], Raven[Odin], Catherine[Hela], Lauren[Heket], Unky Chai[Yue Lao]
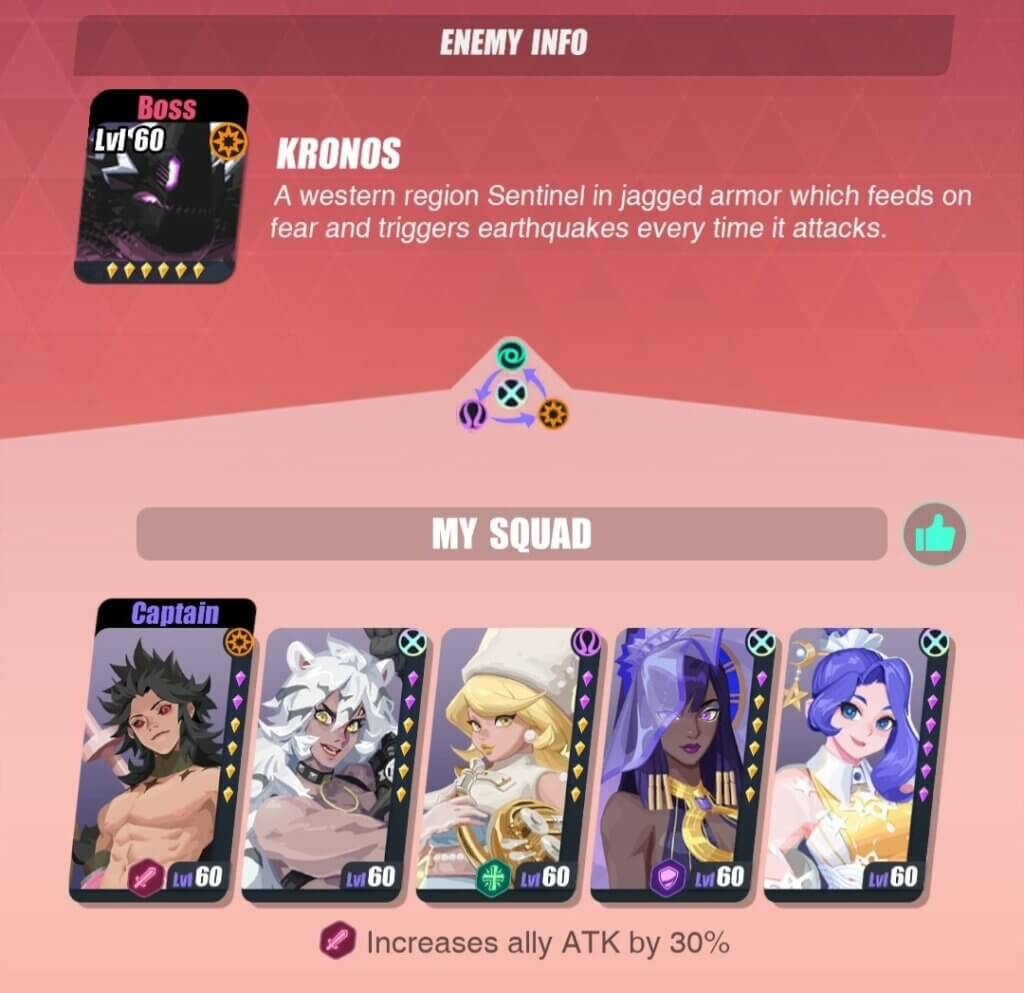
Donar[Thor] Solo
Donar[Thor] is an Esper who is capable of soloing Kronos. Equipped with a Hades 4 piece set and a Sword of Avatara 2 piece set, not only does he have an elemental advantage and will often Resist attacks, but stacking defence means he can never be killed by Kronos barring some unlucky stun chains, and will just heal damage back via counter attacks and his high defence to damage ratio skills. This allows you to bring food/fodder in, to farm both Relics as well as experience.

Apep Breakdown
Apep is harder than Kronos to start farming, but is definitely easier to build teams for– that is to say, because of Apep’s mechanics, team building is much clearer. There are again, two schools of team building that beat Apep: The laid back team centered around Jacob[Jormungand], and a team focused around a 1-2, hard-hitting, single-hit DPS Espers.
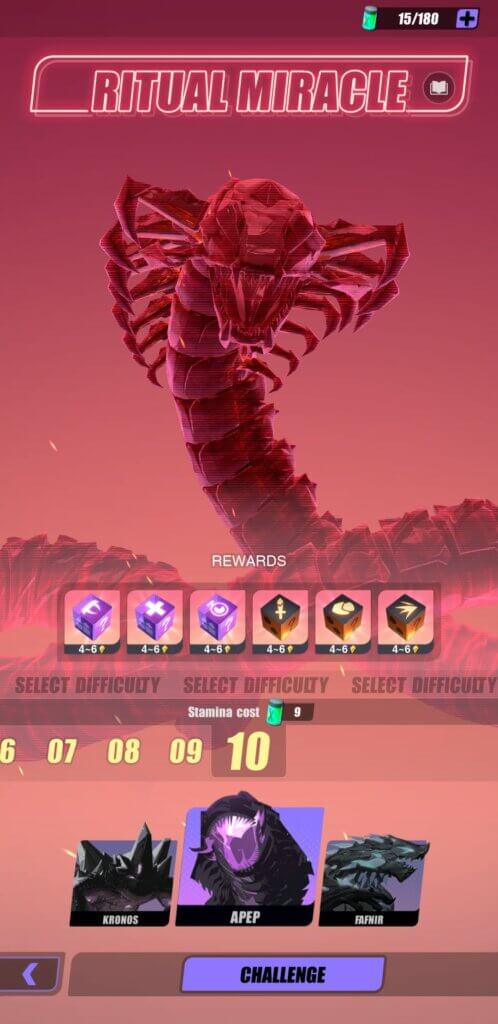
Apep key points:
- attacking Apep gives the attacking Esper a 3 turn Poison debuff. This can be Resisted, and or ignored with Immunity;
- Apep’s spammable attack hits all Espers, and inflicts 2 separate 2 Turn Poison debuffs;
- Apep has a special Counter: Toxic Detonation. The turn has a long cooldown, but the cooldown goes down by one turn for each attack that Apep suffers. This means that multi-hits will reduce the cooldown by multiple turns: Mona[Artemis]’s Lunar Hail hits 3 times, and thus Toxic Detonation’s counter will go down by 3. Because of this, it is highly recommended to use strong, single-hit Espers against Apep;
- Apep’s Tablets are a little more dangerous than Kronos’. While they don’t immediately give Apep turns, they synergize better. Blessing Tablet dispels all buffs on one target, and for each buff dispelled, that Esper gains a 3 turn Poison debuff. Suppression Tablet will attack all Espers, and Stun any Poisoned targets. It’s good to note that both of these effects can be Resisted, although Immunity only works on Suppression Tablet.
Due to all of this, the most important thing for team building is to ensure that Poison debuffs don’t land to allow both Apep and his Tablets to combo. The second most important thing is to ensure that any Poisons that do land are cleansed to minimize any upcoming damage. The third is to try and take Apep at your pace and not his– multi hit attacks speed up his Toxic Detonation, which if triggered at the wrong time, will result in tremendous amounts of damage hitting you.
Jacob[Jormungand] Core
Jacob[Jormungand]’s team is extremely easy to build if you have him. His Skill 2, Entoxification, not only prevents poison on all allies, but also has a 70% chance of inflicting Poison back on Apep. At full skill upgrade, this skill has a 3 turn cooldown, meaning he only has one turn where the defences aren’t up. This is often shored up with a support Esper like Chang Pu[Yao Ji] to provide the Immunity buff for in between turns, or Unky Chai[Yue Lao] to reduce cooldowns, to provide more uptime. The last two slots are left for whatever else the party might need, maybe a DPS to speed kills along, or another support for comfier clears. Higher power teams can even use this set up to bring along food/fodder.
Required Esper: Jacob[Jormungand]
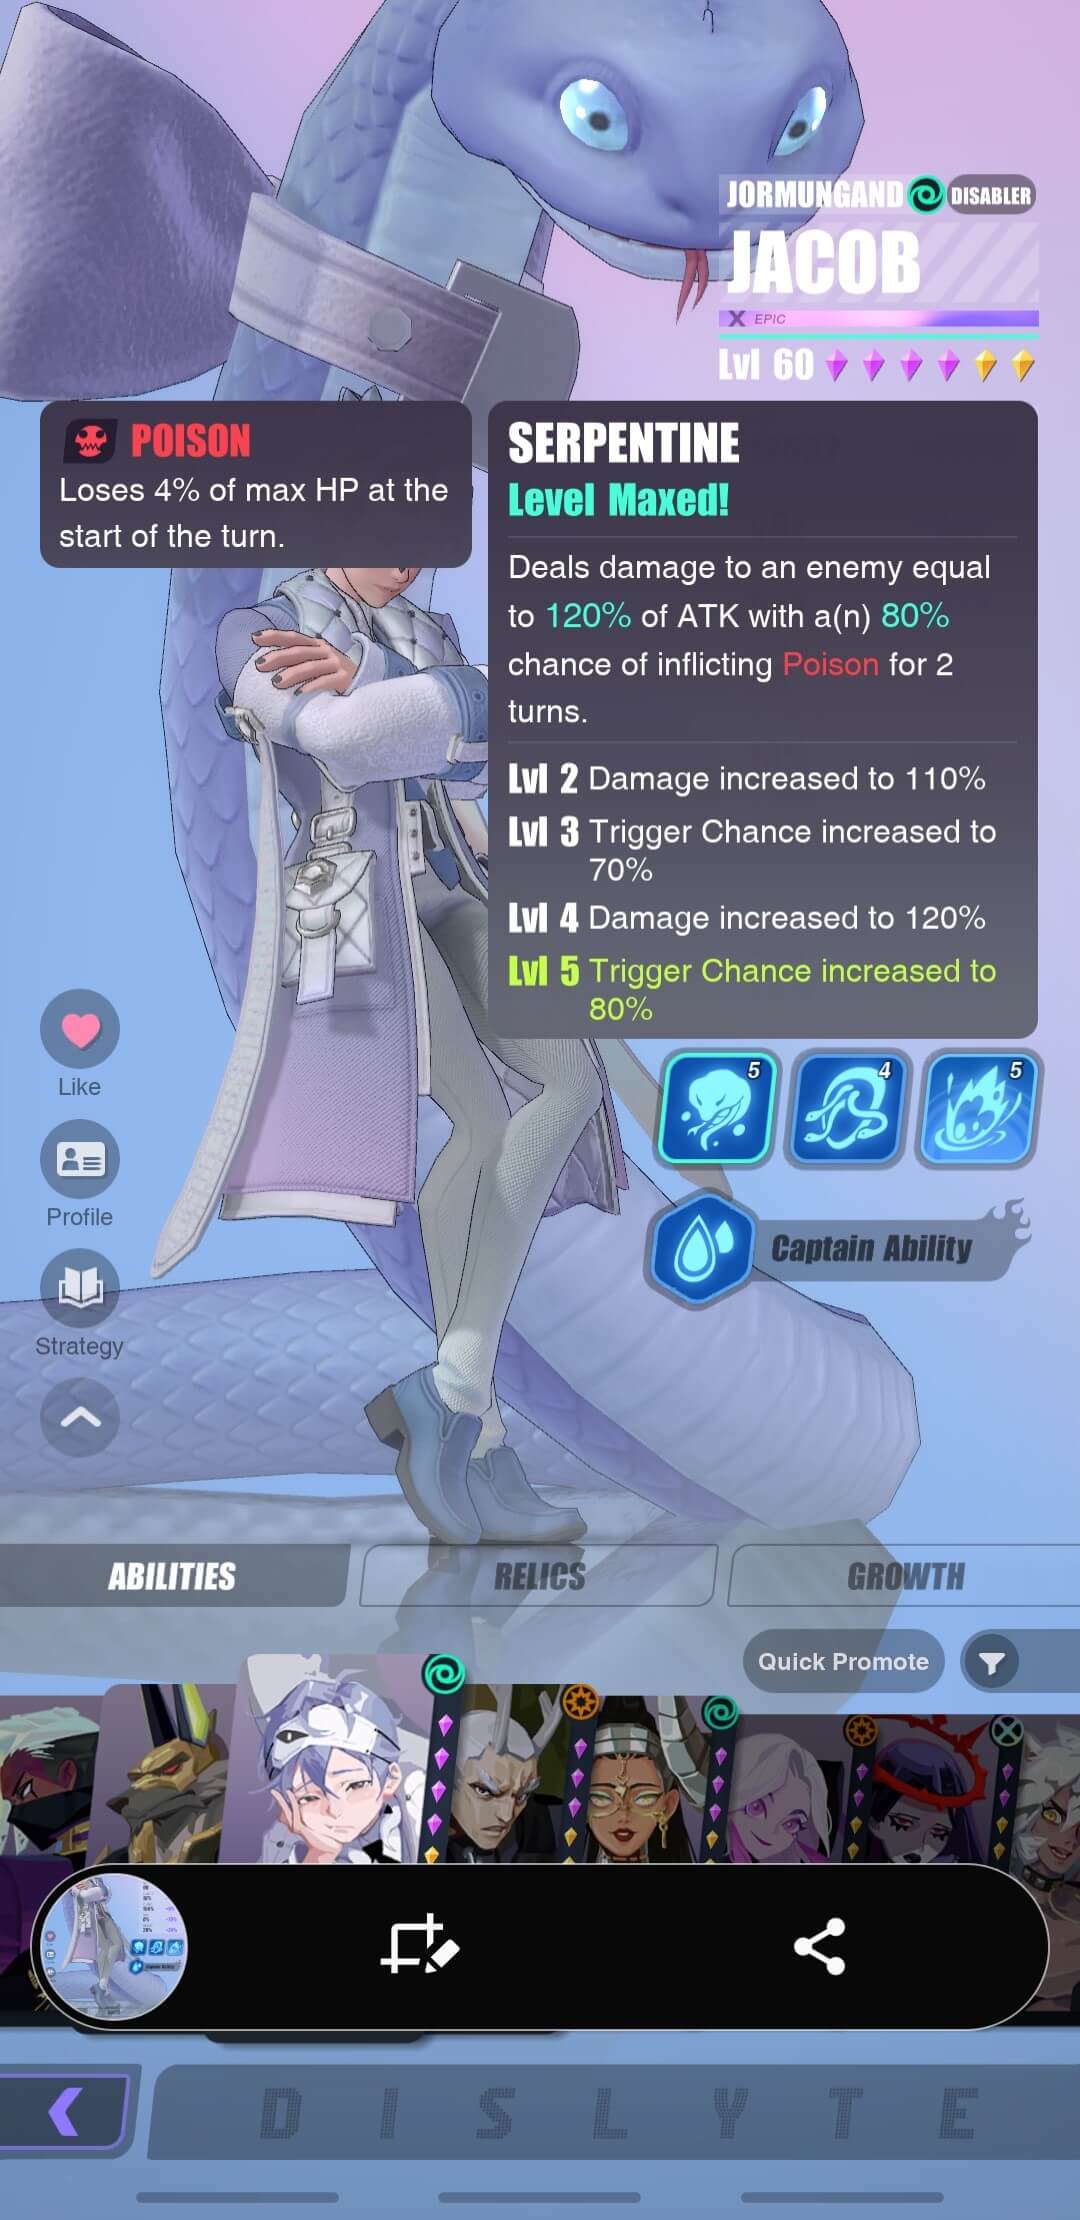
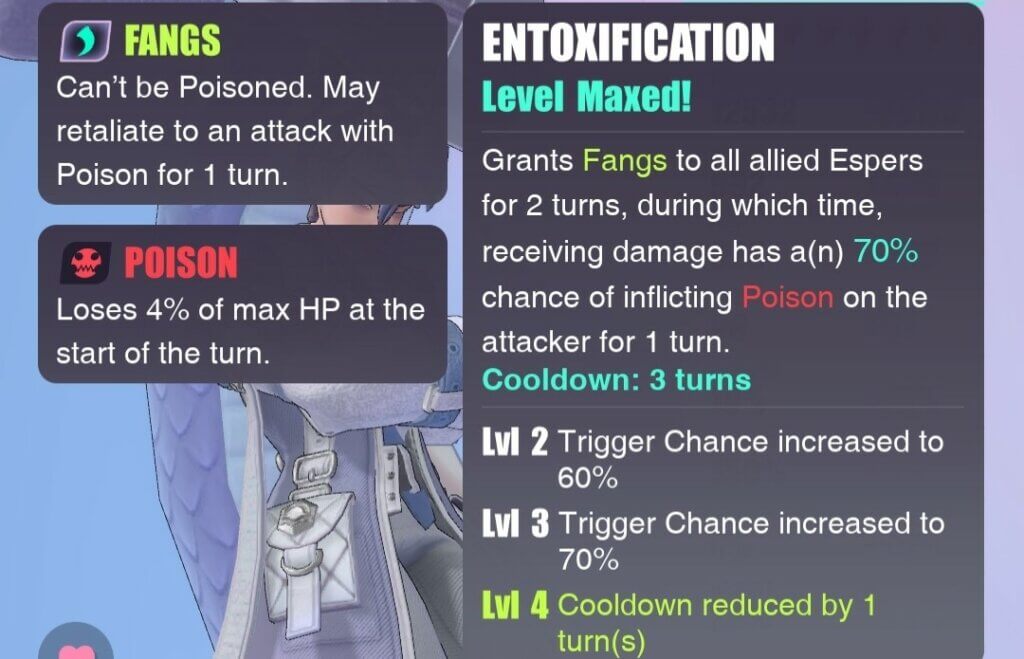
Recommended Support: Chang Pu[Yao Ji], Heng Yue[Chang’e], Asenath[Nefertem], Jin Yuyao[Queen Mother], Fabrice[Freyr]
Alternatives: Ye Suhua[Shao Siming], Catherine[Hela], Clara[Hera], Unky Chai[Yue Lao]
Recommended DPS: Drew[Anubis], Freddy[Fenrir], Taylor[Hercules], Lin Xiao[White Tiger]
Alternatives: Narmer[Ra], Zelmer[Sekhmet]
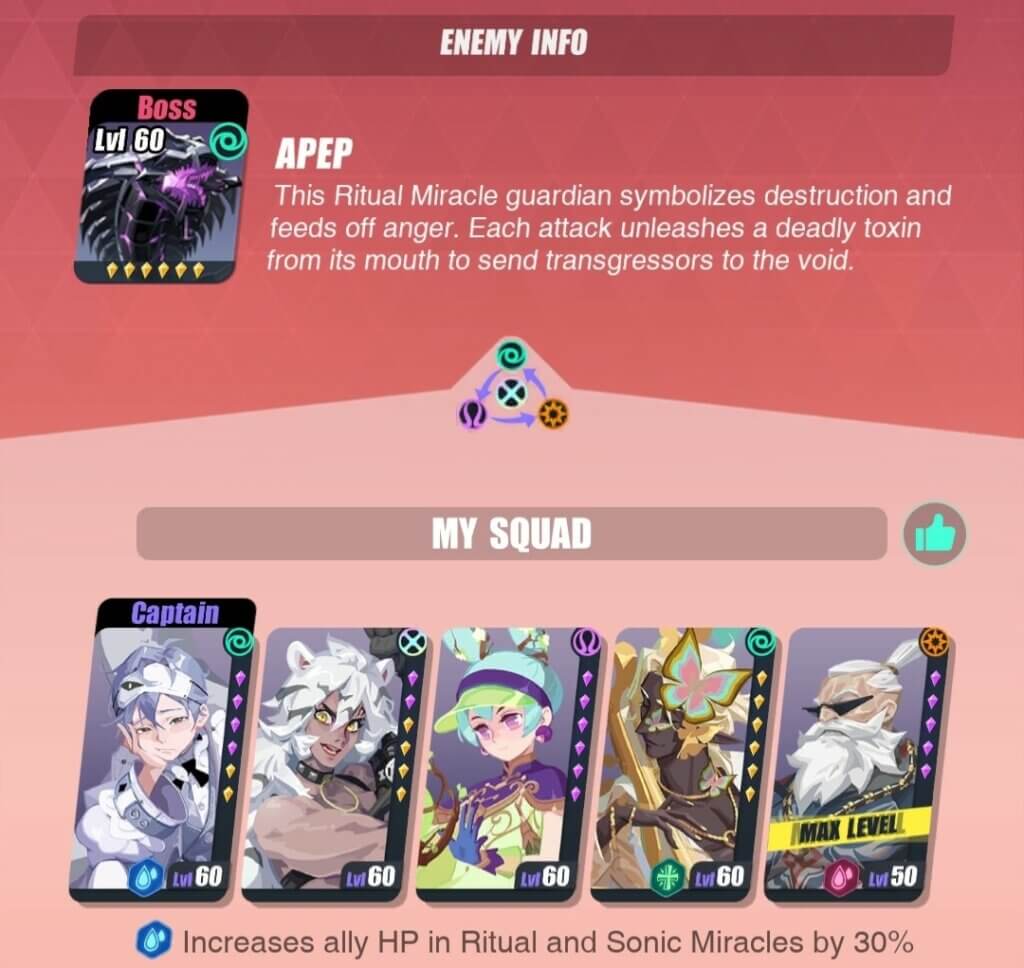
Basic Team
The basic team takes the fight a little slower, prioritizing survival above killing Apep quickly. Because of this, there’s a higher focus on single hits– ensuring that all damage taken is controlled and when you need it to. This team can still auto-battle effectively, and in some cases might even clear faster than the Jacob Core, but just needs a bit more finagling and finesse to ensure it clears at a 100% success rate. To build this team, pick one or two of the recommended DPS, and then fill with dispels, immunity, and healing Espers.
Recommended DPS: Drew[Anubis], Freddy[Fenrir], Taylor[Hercules], Lin Xiao[White Tiger]
Alternatives: Narmer[Ra], Zelmer[Sekhmet]
Recommended Support: Chang Pu[Yao Ji], Ye Suhua[Shao Siming], Heng Yue[Chang’e], Asenath[Nefertem]
Alternatives: Catherine[Hela], Clara[Hera], Unky Chai[Yue Lao], Jin Yuyao[Queen Mother], Fabrice[Freyr]
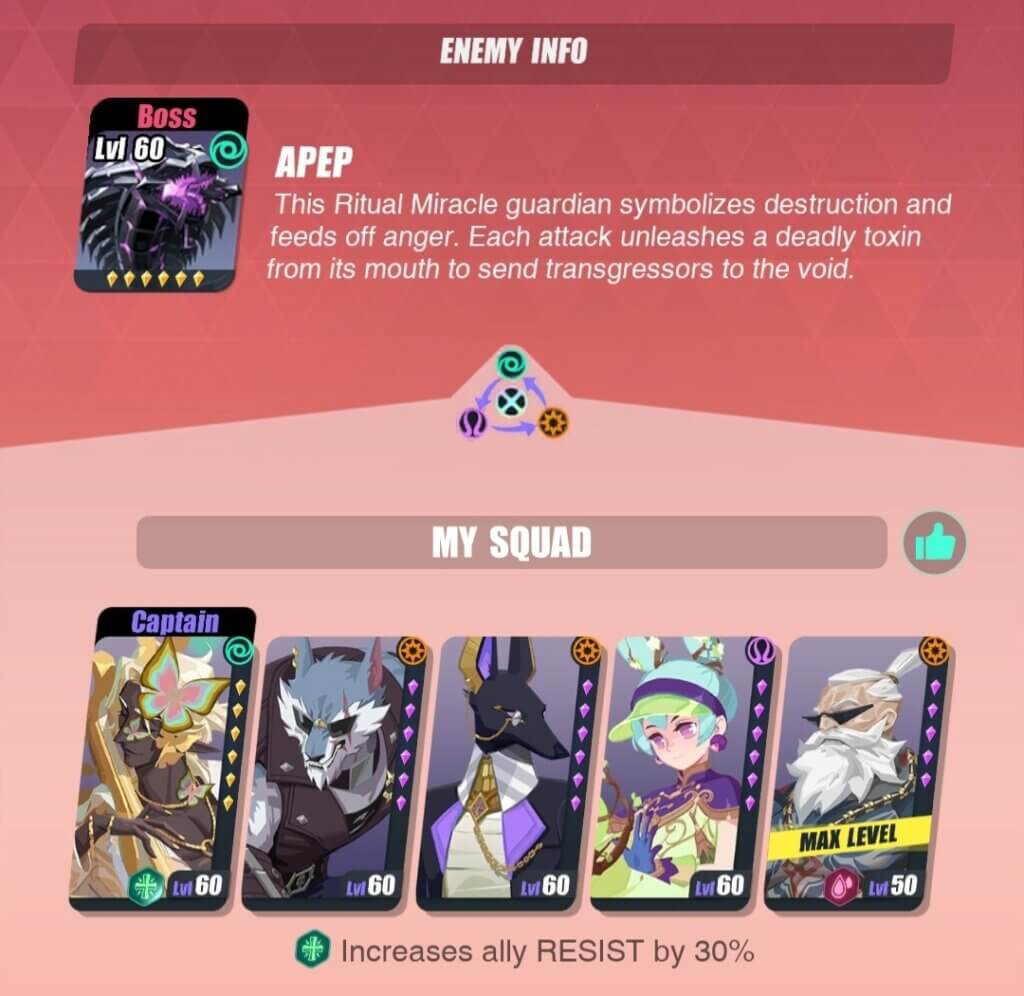
Fabrice[Freyr] (Leader), Freddy[Fenrir], Drew[Anubis], Chang Pu[Yao Ji], Unky Chai[Yue Lao]
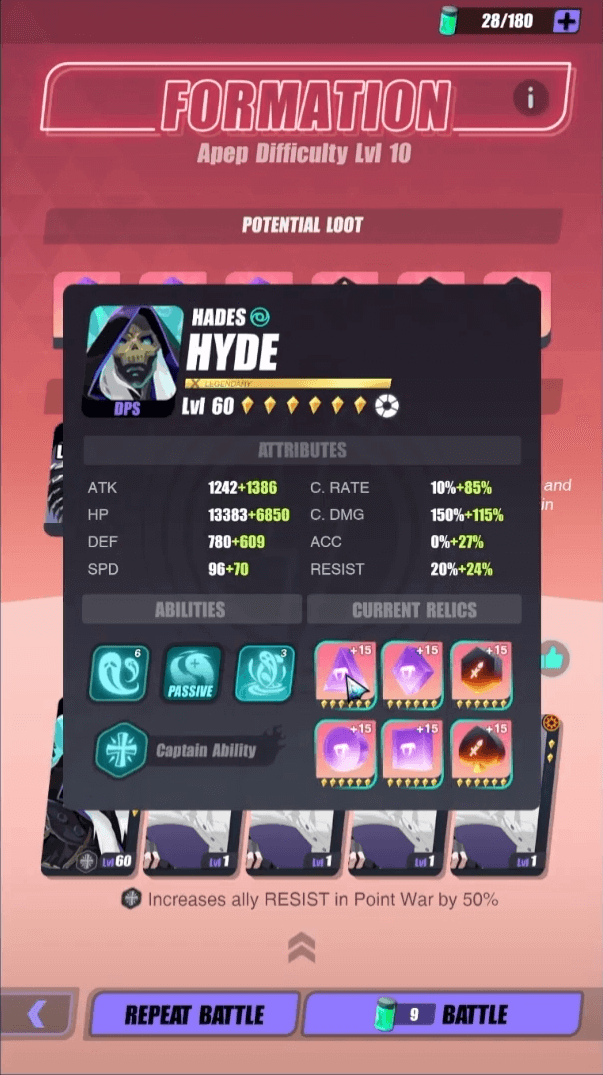
Hyde[Hades] Solo
Hyde[Hades] is an Esper capable of soloing Apep, albeit with some fairly high Relic requirements. You essentially equip him with a Hades 4-piece set, and a Sword of Avatara 2 piece set. Because of his immunity to all debuffs, he slowly gains power with each attack that he makes as well as takes. You can bring in 4 weak food/fodder that die quickly in order to give him a big boost to damage from the get-go, and just let him auto-battle. His kills are by no means quick, but because he requires no support, this can maximize the amount of food/fodder you can bring in to gain EXP as well.
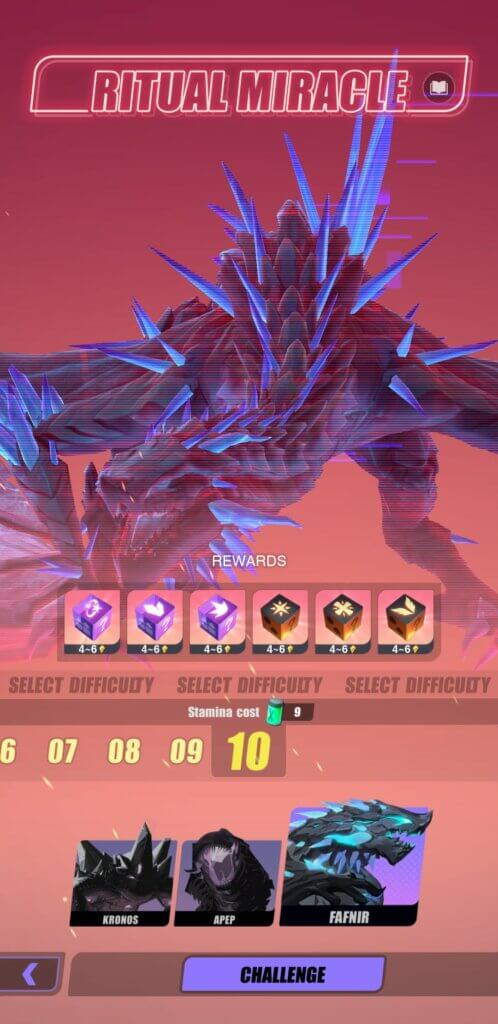
Fafnir Breakdown
Fafnir is easily the most complicated and difficult of the Ritual Miracle bosses. With a mechanic specific only to her that ignores regular mechanic conventions, she is notorious for pushing Espers to the limit, and requiring well-crafted teams and high level Relics to beat. There are two variations of common teams that beat Fafnir: The multi-hit team that rushes Fafnir down, and the defensive formation that wins through a battle of attrition. Both teams also need to make use of Dispels or Buff Steal, cleansing debuffs, and have enough healing to survive the onslaught. To make matters worse, AP Boost / AP Down moves do not work in Fafnir, meaning the fight is fought at the dragon’s pace.
Fafnir key points:
- Fafnir has 5 health bars. When 1 bar is depleted, Fafnir gains a special type of Shield, Andvari’s Treasure, that can only be broken via a certain number of attacks on it. She also inflicts a special Freeze status on the Esper that depletes the HP bar. If Fafnir is still Shielded when her next turn comes, she gets to use an extremely powerful attack, Dragon’s Curse, on the Frozen target, although they will be unfrozen if they survive;
- If the frozen Esper dies from Dragon’s Curse (which is highly likely, especially at higher floors), Fafnir gains a damage buff. Since Dragon’s Curse dispels all buffs before dealing damage, you cannot soak this with Invulnerability, Shields, or DEF UP. This is the main reason why multi-hit Espers comprise such an offensive core: breaking the Shield bars Fafnir from gaining buffs. Breaking the shield also immediately frees the Frozen target early, which allows for the offensive to continue;
- Fafnir’s Freeze cannot be Resisted, ignores Immunity, and cannot be Cleansed. It also bypasses Hyde[Hades]’s natural ability to not be disabled, and cannot be passed back by Jin Yuyao[Queen Mother] or Layla[Medjed];
- Fafnir’s basic attack hits all Espers, and has a chance to Stun if Fafnir has a buff. Notably, Andvari’s Treasure, nor the buffs granted on death by her Tablets count;
- Fafnir’s Tablets make you want to get rid of them, but doing so gives Fafnir buffs. The Suppression Tablet will hit all allies and inflict Disease, making it so you cannot heal them. On death, it boosts Fafnir’s ATK. The Blessing Tablet will either cleanse all debuffs on Fafnir, or if no debuffs are present, grant Immunity. On death, it boosts Fafnir’s SPD.
Multi-hit Team
The multi-hit team is more of an offensive team, focusing on making sure every Esper brought has multiple hit attacks in order to constantly break Andvari’s Treasure. At higher difficulties, Fafnir’s Shield will require 12 hits to break, and with one frozen Esper, which means all remaining Espers not only need to have multiple hits, but also need to be fast enough to ensure they break the shield. These teams often only bring as much defensive support as is required to blitz through Fafnir, as they are not necessarily looking for an extended skirmish. Buff Removal is often a little difficult to fit into this team style, but can be covered via Support Espers. Instead, the emphasis is put on providing Immunity, so that Fafnir will never Stun key targets.
Recommended DPS: Tang Yun[Six-Eared Macaque], Lynn[Hathor], Lu Yi[Dayi]
Alternatives: Hall[Hodur], Zelmer[Sekhmet], Mona[Artemis]
Recommended Supports: Berenice[Bastet] (Leader), Sally[Sif] (Leader), Triki[Loki], Long Mian[Ao Bing] (Leader)
Alternatives: Gabrielle[Njord], Catherine[Hela], Clara[Hera], Unas[Shu], Fabrice[Freyr]
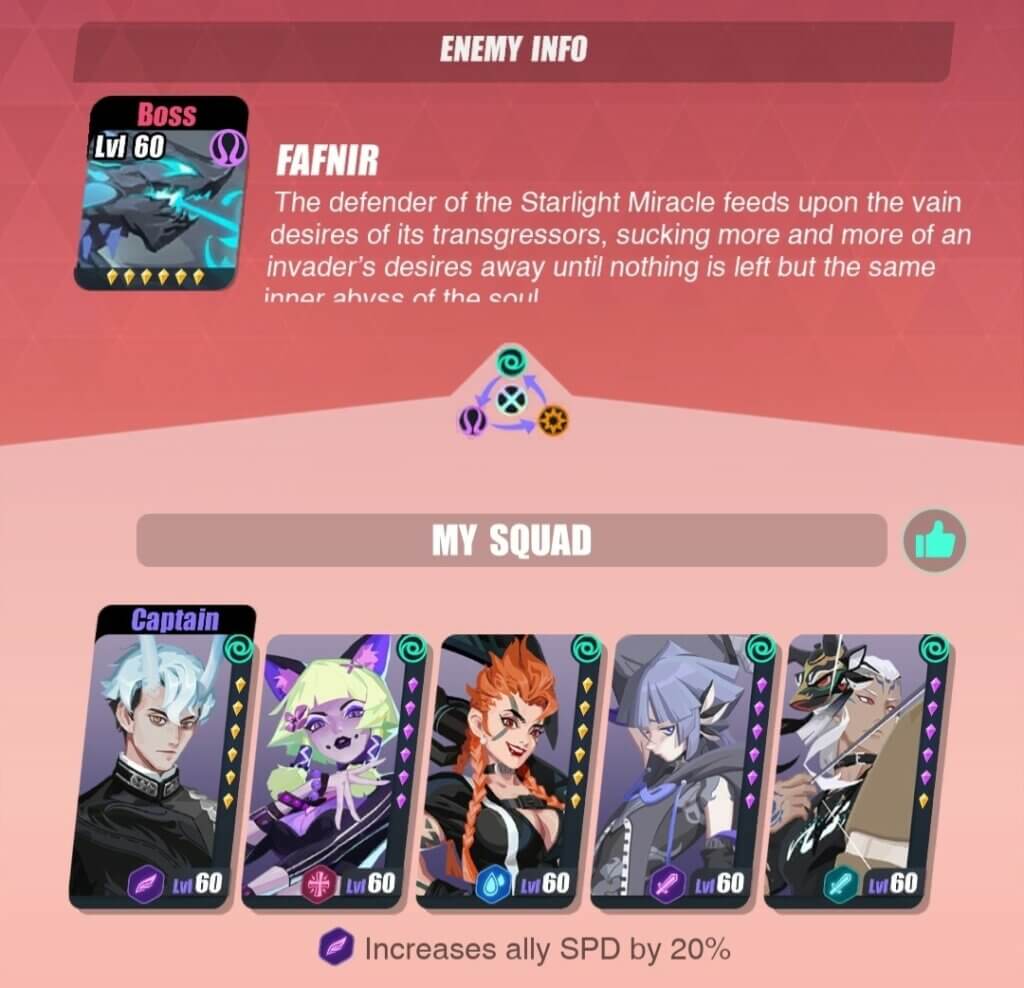
Long Mian[Ao Bing] (Leader), Berenice[Bastet], Gabrielle[Njord], Tang Yun[Six-Eared Macaque], Lu Yi[Dayi]
Basic Team
The basic team employs less multi hitters, but instead focuses on surviving Fafnir’s attacks through constant debuff cleansing and passive defence buffing. They will sometimes, but not always, kill Fafnir’s Blessing Tablet if they don’t run enough buff removal, and just deal with the fact that Fafnir becomes faster, often by including SPD Down debuffs in their party somewhere. They are able to survive Dragon’s Curse through a variety of ways, often only using Wind units for the chance that Fafnir can Miss, using passive defensive buffs from an Esper like Sally[Sif], and using ATK Down and Miss Rate Up debuffs to lessen incoming damage. Since the Frozen Esper is freed as soon as they take damage, surviving the big hit effectively skips the need to break Fafnir’s Shield. Because of the emphasis on survival, teams built this way run only 1-2 DPS, saving space for Support Espers who can help survive damage and provide Immunity, or cleanse debuffs.
Recommended DPS: Tang Yun[Six-Eared Macaque], Lynn[Hathor], Lu Yi[Dayi]
Alternatives: Hall[Hodur], Zelmer[Sekhmet]
Recommended Supports: Berenice[Bastet] (Leader), Gabrielle[Njord], Triki[Loki], Sally[Sif] (Leader), Long Mian[Ao Bing] (Leader)
Alternatives: Melanie[Medusa] (Leader), Brynn[Valkyrie], Asenath[Nefertem], Eira[Freya], Chang Pu[Yao Ji]
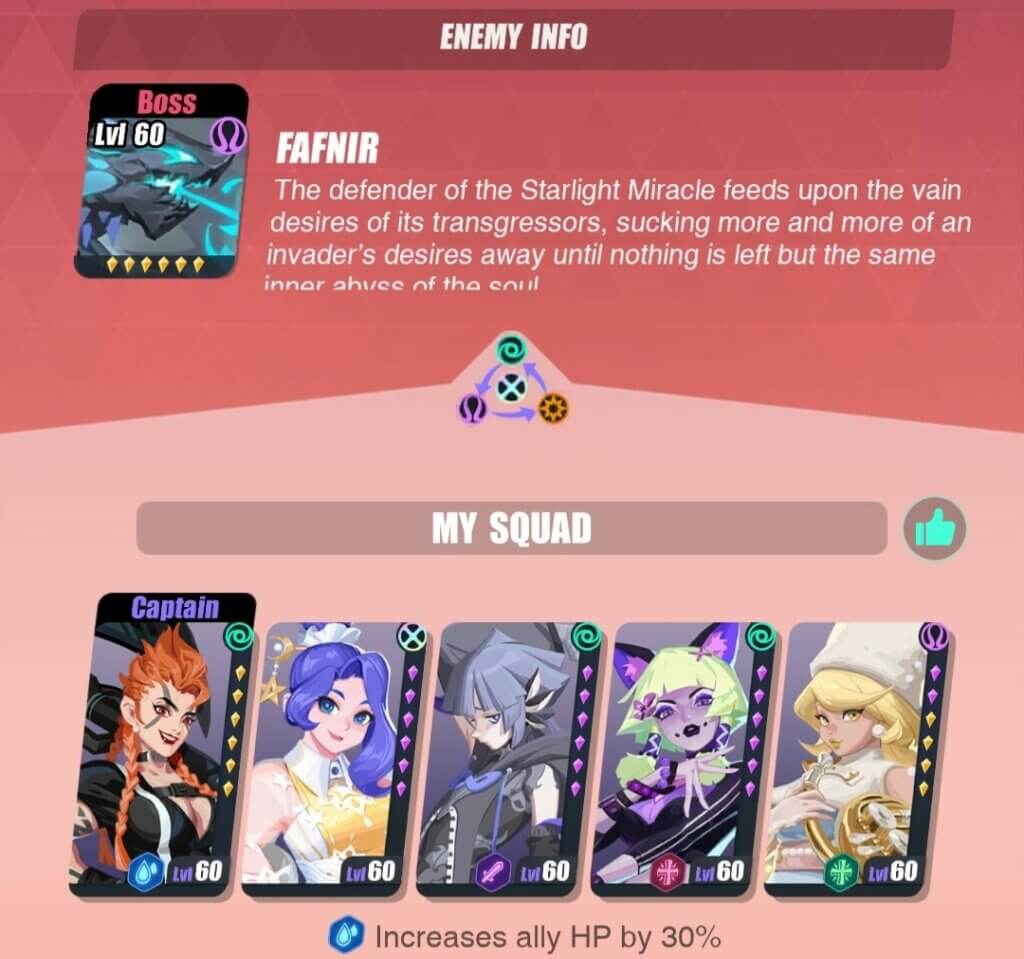
Gabrielle[Njord] (Leader), Ye Suhua[Shao Siming], Tang Yun[Six-Eared Macaque], Berenice[Bastet], Sally[Sif]
Espers
Best Beginner Esper
All new accounts have a special x10 summon that guarantees one of three Legendary Espers. These are on a rotation on which legendaries are available.
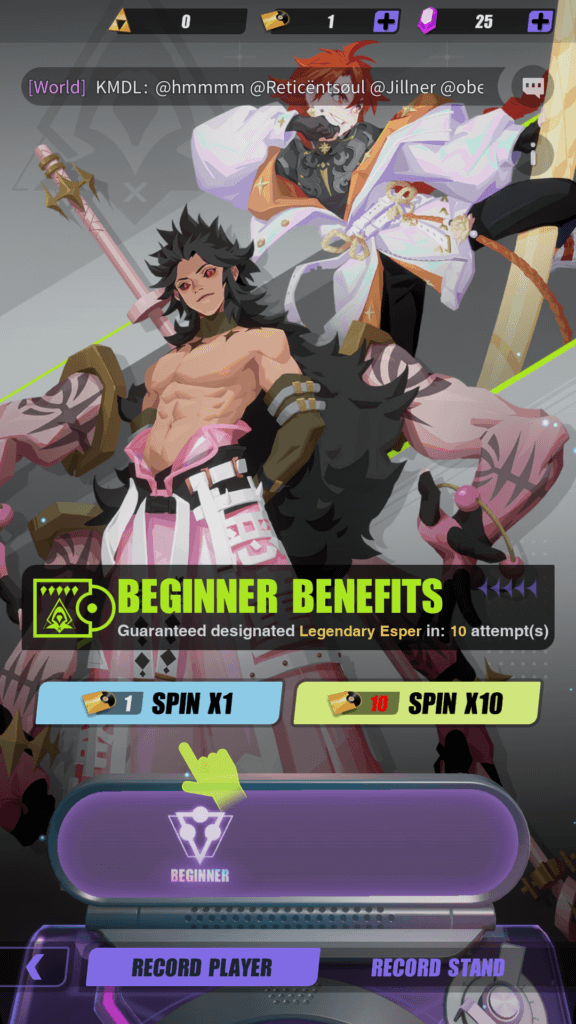
As of April 26, 2022 (version 3.0.0), the Espers that are available are Li Ling[Nezha] and Tang Xuan[Wukong]. Each of these Espers fill in a different niche in some sense, and can offer a cornerstone to a starter team.
Li Ling[Nezha] is an all-rounder that offers good DPS as well as some light AP Theft options in his attacks. He also has built in lifesteal, and has the potential to replace Mona[Artemis] as your farming Esper. His innate AP theft and ability to scale off of enemy max HP also means he is an extremely good candidate for Kronos and can often be the cornerstone DPS for an AP Down + SPD Down team.
Tang Xuan[Wukong] is an AoE centric Esper that also comes with lifesteal and a personal shield to boot. Instead of AP Theft,he instead comes with the ability to inflict Disease, DEF Down, and boost his own damage. He offers more damage, especially in AoE situations than Li Ling[Nezha], but less single target damage than Lewis[Ares].
Exclusive Espers
Some Espers cannot be obtained simply through Gold Records (GRs). No matter how many you use, you will never see the following Espers:
Melanie[Medusa] only comes from the Club Shop. You can buy 5 Melanie[Medusa] Ripple Fragments for 100 Club Points. You will need 30 Ripple Fragments in total to summon her, and you can only buy 15 Ripple Fragments per week.


Ye Suhua[Shao Siming] only comes from Ripple Dimensions. You will need 30 Ripple Fragments in total to summon her, and you can get up to 5 Ripple Fragments per Dimension.

Dhalia[Calypso] only comes from Ripple Dimensions. You will need 40 Ripple Fragments in total to summon her, and you can get up to 8 Ripple Fragments per Dimension.

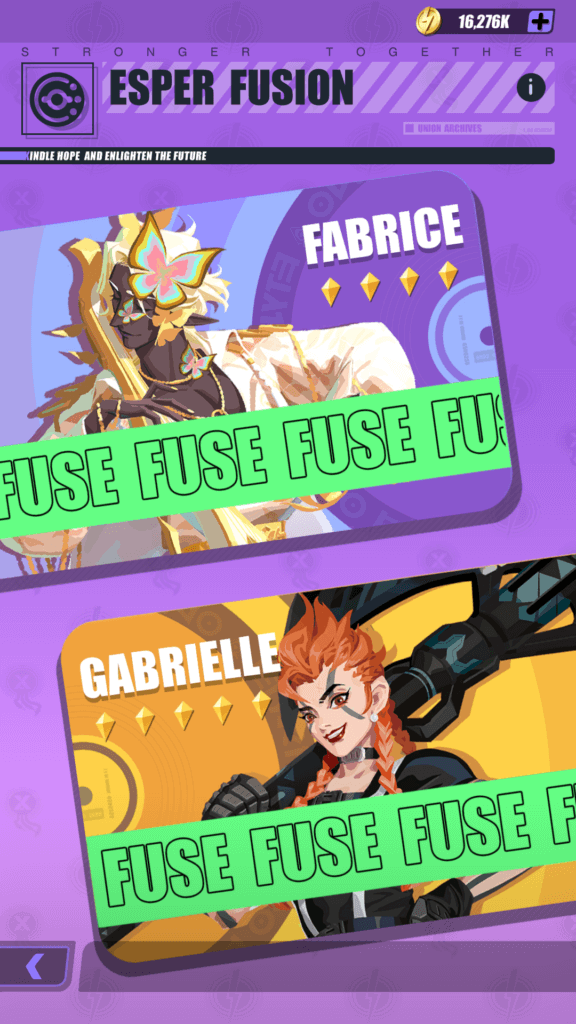
Fabrice[Freyr] and Gabrielle[Njord] are available only through Esper Fusion. (see: Should I fuse the Espers in Esper Fusion?)
Ripple Dimensions
Ripple Dimensions are special stages where, upon clearing, you obtain a Ripple Fragment of the Esper allocated to said Dimension. Upon obtaining 30 Ripple Fragments (for Rare Espers) / 40 Ripple Fragments (For Epic Espers), you can summon that Esper directly in the Gacha Tab via the Record Stand.


There are three ways of entering a Ripple Dimension:
- You have a chance of randomly opening one while after completing a Ritual Miracle or Sonic Miracle stage.
- You can enter one that someone on your friends list or club has opened.
- You can enter one that has been linked in the chat.

Keep in mind that all Ripple Dimensions are made public after 15 minutes have passed from when they’re discovered. You can enter any Dimensions opened by a friend or club member before they are made public, as you have priority. Ripple Dimensions have a limit on how many people can enter.
Should I farm Ripple the Ripple Exclusive Espers?
Ye Suhua[Shao Siming] is the 3★ exclusive Esper, and is an extremely useful buff-style support Esper with some minor healing capabilities. She is usable in all content and is an extremely good Esper to have.

Dhalia[Calypso] the 4★ exclusive Esper is an offensive buff support in the same vein as Unky Chai[Yue Lao], with her ability to provide both ATK Up and CRIT Rate Up. Unlike her 3★ counterpart, she has the ability to also boost AP, and also inflict SPD Down, Stun, and Freeze. Though she has slightly less uptime on her buffs, she relies less on random chance to get buffs up, although she cannot lower skill cooldowns. She is still an extremely useful Esper, able to provide both offensive support as well as help control the flow of battle.

Who should I use for Esper Fusion?
Because Esper Fusion requires you to use Espers as materials that have a specific level of Ascension, you will need to use Rare Espers or better. The best rule of thumb is that you should only use those Espers you have copies of and have already fully Ascended, but there are always some for each Element that are considered ‘Inferior’ and thus generally always good fodder.
For Inferno , Bardon[Baldr] or Li Ao[Tao Tie] are considered the best fodder.
For Wind, Hall[Hodur] or Zelmer[Sekhmet] are considered the best fodder.
For Flow, Helena[Helen] and Leon[Vali] are considered the best fodder.
This doesn’t mean you can’t or shouldn’t use the other Espers from these elements, but the others have potential application elsewhere and you shouldn’t use them unless they’re truly extras.
Should I fuse the Espers in Esper Fusion? 4-28-2022
It takes a lot of work to grind for these Espers, so that’s a heavy factor in your own personal choice. At the very least, I would build one of each, and then decide whether or not you want to build more for resonance.
Fabrice[Freyr] is a great support Esper, and one of the more consistent Immunity Espers available. He also has minor healing, and a single target AP Boost, and works well in compositions centered around 1 major threat, keeping them alive. His Wind element also makes him useful in Fafnir as well, a boss with relatively few options.

Gabrielle[Njord] is perhaps the best defensive-oriented buff Support Esper. She is able to provide both Immunity and DEF Up to the party, while also inflicting ATK Down and DEF Down to the enemy. She has a naturally high speed, tied for second in the game, and is also quite bulky too. Building her as a natural support also helps increase the damage on her S1, allowing her to provide decent output for a support Esper. She is highly prized and extremely well worth the grind.

Special Thanks
OPElvy – For running tedious stages for compiling data and comparisons
OPDribble – For being perhaps the most meticulous editor, but also someone who helped keep this guide consistent
2ndG – For nabbing some screenshots I couldn’t get myself!
And you! For taking the time to read. I hope this answers a lot of questions you have– if you have any more you think should belong here, please feel free to DM me on Discord (Dudeogama#0122).
Good luck out there, Espers! May your rolls be legendary and your gear flawless.



Is this guide still relevant for the Global release because those XP spots on the map have a different icon. are they the same?
Yes, it is now updated for the Global Launch!
Does anyone know if the “recommended formation” option that appears at the start of a battle is really the best option for your team? I am currently not following it’s recommendation and want to know if that is a bad decision.
To be, it’s not useful at the moment.
Why there nothing about bounty missions
Great one! I have added the Bounty section.
You can take a look here also: https://playdislyte.com/bounties/
Thank you so much!
Great guide. thank you
How do I unlock more tracks for the DJ?
More tracks coming soon!
What is the difference between controllers and support?
controllers are the Espers that can “control” the enemies with effects like stun, freeze, etc.
If you want I can help provide screenshots and information. My in game name is Tamayo.
It would be awesome if you can share some beginner tips with us!
Is there a disclosure of the attack calculation anywhere?
Like is flat attack bonus added before or after attack bonus%?
Gotta make an article for this. Thank you for the advice!
All of the additional stats should be added towards the base stats, separately.
So I just an esper with this “aura/glow” on it and now I have no 8dea what it means
Can you give us more details please?
Awesome guide!
Gld that you have found it helpful, mate!
So can we have detail of the tier list for each small type ,like aoe dps and single dps etc…and what equipement should they take pls?
Check out our current tier list here: https://playdislyte.com/tier-list/
About Resonance: Does it give more points when one promotes the Espers first? For example if I promote a 3* all the way up to 6* first, will I get more Resonance Points when performing the Resonance with a 2nd copy? (Would I need a 2nd 6* fodder for the promoted Esper too?)
Would be good to include that information in the guide, but overall well written!
No, the amount of points you get is the same!
Thank you for asking, that’s an interesting question!
The explanation of the elements is a little confusing – it says they don’t affect debuffs landing, but then it says elemental disadvantaged attacks have +50% miss rate, which causes debuffs not to land.
I fixed the first part to make it less confusing. Thank you a lot!
Once I save my defensive formations for Point War and Holobattle, do those relic loadouts in my espers get saved as well? If I later swap around relics to get some auto farming in, or I want to experiment with relics to push Tower, does that therefore screw up my defensive formations? Likewise, I am curious on how it works with Helper Espers as well.
As far as I know, changing relics doesn’t affect your power in those modes 🙂